BUILD ALL THE THINGS!
The new branch auto-detection feature in AWS Amplify Console allows you to deploy entire environments for all branches of your Git repository. You can specify branch name matching patterns as well, making it quick and easy to set up custom deployment strategies based on how your team works, not how your CI works.
Let's take a look at setting up a fresh new environment for each branch pushed to your app's repository.
The first step is to connect your Amplify project or static app/website to Amplify Console (if you already have an app deployed you can skip to this part).
Setting Up a Project on Amplify Console
Creating an App
For this example, I'll be using a create-react-app and Amplify Framework to set up a small app with authentication. To set up your own app you can either follow along, or use the 1-click deploy button below to deploy the same repository I'll be using in this example.

First create a new React project:
npx create-react-app my-app
Next, you'll need to initialize Amplify from the root directory of my-app.
amplify init
One of two things will happen when you run this command. If you have some AWS user profiles on your computer it will ask if you want to use a profile. (If you have a profile with administrative and programmatic privileges feel free to choose that.) If you don’t have any user profiles created already, or you’re unsure if a current profile will work, then the CLI will actually walk you through how to create one, even going so far as to open the AWS console for you and pre-populating any fields. (You basically just have to click a few buttons, easy peasy.)
For a more in-depth walkthrough of creating a new user profile, check out this informative video from Nader Dabit.
Now that Amplify is properly configured you can start setting up AWS services in your app. The next step is to commit the app to your git repository of choice.
Connecting Your App to Amplify Console
To connect an app in Amplify Console, navigate to https://console.aws.amazon.com/amplify/home and click on Get Started under the Deploy section.
In order to connect an app for auto branch detection, you'll need to have your app stored in a Git repository provider like GitHub, BitBucket, or AWS CodeCommit.
Next, choose the source control provider and repository you want to connect. Once you have selected the repository and main branch, click Next.
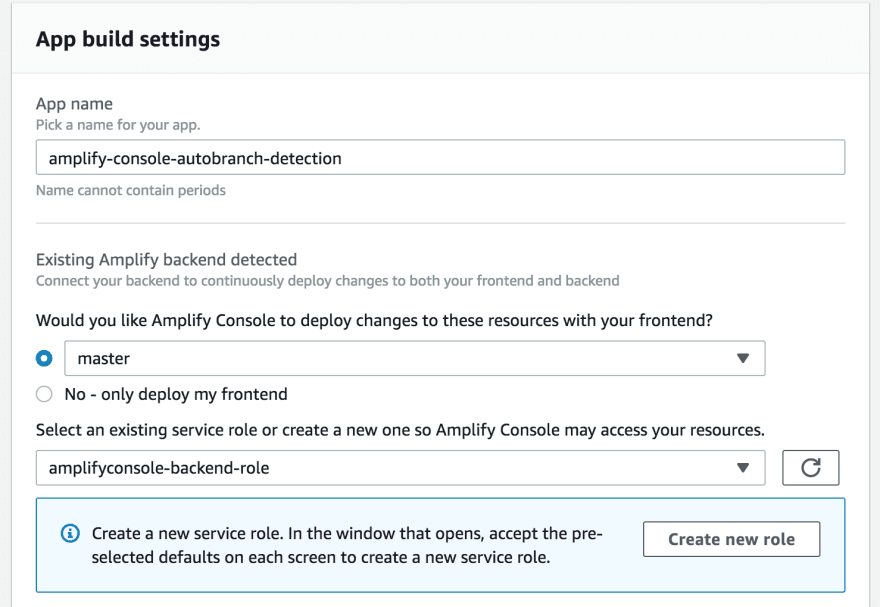
Choose master for Amplify backend to deploy and choose (or create a role) so Amplify Console can deploy the backend as well as your app:
Leave the rest of the build settings as is and click Next again. Finally, click Save and Deploy.
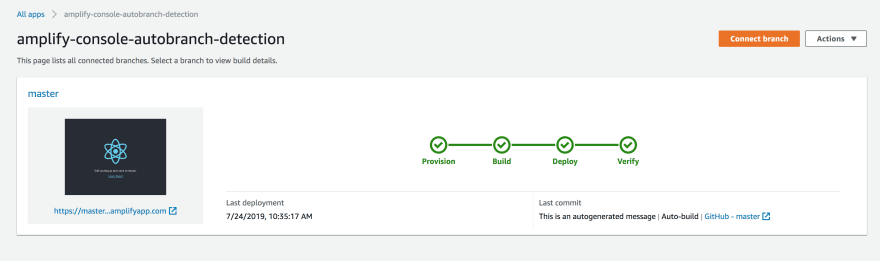
Once your app builds, you should see something like this:
Now that you have an app connected, it's time to set up builds for all of your branches that get pushed to your repository!
Setting Up Auto Branch Detection
Configuration
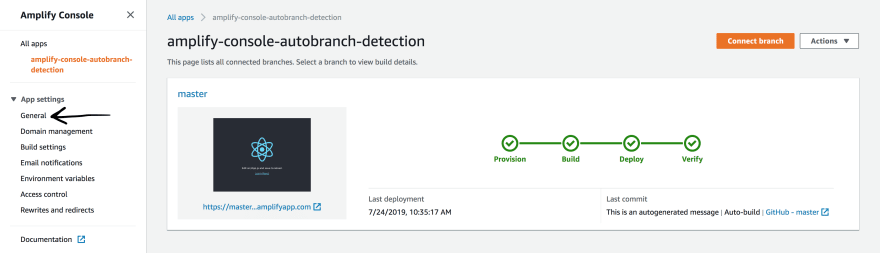
To set up automatic branch based deployments, navigate to the app you want to configure deployments for and from the App settings menu, choose General.
Next, click Edit on the App Details section:

Once, you're in edit mode, toggle the Branch autodetection switch and specify * for the value of the Branch autodetection - patterns input.
Make sure Create new backend environment for every connected branch is checked and then click Save.
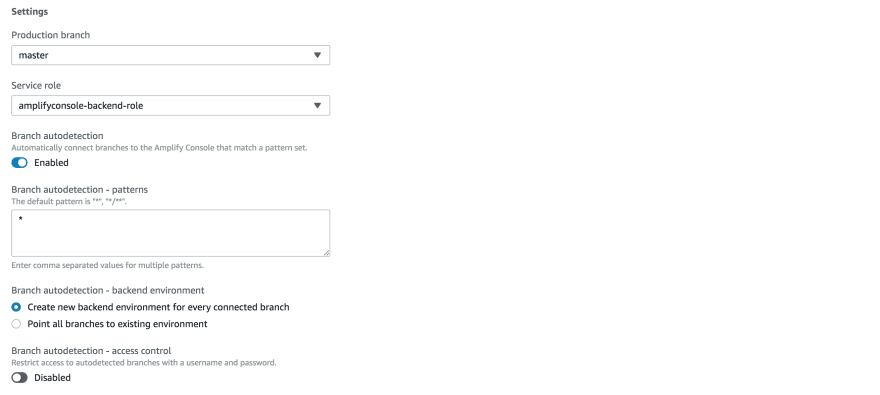
We used
*in the patterns input because the patterns are regex, so in this case we are matching all branch naming patterns. We could however, only deploy branches that follow a particular naming convention, maybe you only want to deploy release branches, you could then do something likerelease-*which would match any branch beginning with that prefix.
Testing It Out
To ensure the branches will be deployed, create a new branch locally called add-auth.
Next run the following Amplify command:
amplify add auth
Once you run the command you will be asked if you want to use the default configuration to set up authentication for your app. This is the recommended auth settings for AWS.
Choose this option if you aren’t familiar with how to configure your own user pools and Cognito configuration.
Next you need to run amplify push so that the resources can be created and configured in AWS.
After Amplify creates the remote resources for your authentication service, you need to set up Amplify in your app. To do that you need to install the necessary dependences, and then configure Amplify in your app.
npm i aws-amplify aws-amplify-react

# OR

yarn add aws-amplify aws-amplify-react
Next you need to import the configuration created by Amplify in src/aws-exports.js and pass it to the Amplify client. In src/index.js add the following before the ReactDOM.render call:
import Amplify from "aws-amplify"
import awsExports from "./src/aws-exports"

Amplify.configure(awsExports);
Next you need to add the withAuthenticator component around your App component in src/App.js. This is a drop-in component that provides an entire auth flow for users of your app. Replace the contents of src/App.js with the following:
import React from "react";
import logo from "./logo.svg";
import "./App.css";
import { withAuthenticator } from "aws-amplify-react";

function App() {
  return (
    <div className="App">
      <header className="App-header">
        <img src={logo} className="App-logo" alt="logo" />
        <p>
          Edit <code>src/App.js</code> and save to reload.
        </p>
        <a
          className="App-link"
          href="https://reactjs.org"
          target="_blank"
          rel="noopener noreferrer"
        >
          Learn React
        </a>
      </header>
    </div>
  );
}

export default withAuthenticator(App, true);
If you haven't already started the app, run yarn start from the command line to see the app with login. If you are running the app, you should now see the following:
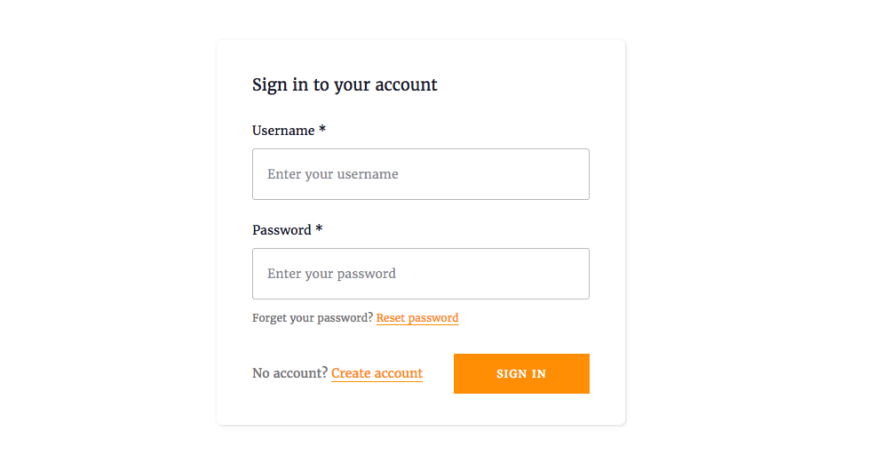
Test it out by creating a user or two and logging in and out. Once you've confirmed everything is working, commit your changes to the branch and push it to your remote repository.
Jump back to Amplify Console and you should see another build for your add-auth branch! Once the build completes, follow the deployment URL and try to log in with a user you created locally. Notice that the user doesn't exist. This is because an entirely new back-end was deployed just for that branch!
You can also enable
access controlfor your branches, making it necessary to enter a username and password to access the deployment (see image below).

Extra Credit
If you merge the add-auth branch you will get another build on your master branch. Once that build completes try to log in with a user created locally earlier. You should be able to log in as your local and the master branch deployment share the same back-end.
Lastly, you can find out more about Amplify Console and feature based deployments here:
- https://aws-amplify.github.io/docs/js/start
- https://docs.aws.amazon.com/amplify/latest/userguide/multi-environments.html#pattern-based-branch-feature-branch-deployments
- https://amplify.aws/community/
Also, if you want to stay up on the latest things I’m writing about or working on, give me a follow on Twitter!