Table of Contents
Introduction
Adding a video component to a web page
Capture video frames for object detection
Detect objects in video
Prepare the input
Run the model
Process the output
Draw bounding boxes
Running several tasks in parallel in JavaScript
Running the model in a background thread
Conclusion
Introduction
This is a third part of the YOLOv8 series. In previous parts, I guided you through all YOLOv8 essentials, including data preparation, neural network training and running object detection on images. Finally, we created a web service that detects objects on images using different programming languages.
Now it's time to move one step forward. If you know how to detect objects in images, then nothing stops you from detecting objects in videos, because the video is an array of images with background sound. You only need to know how to capture each frame as an image and then pass it through the object detection neural network using the same code, that we wrote in the previous article. This is what I am going to show in this tutorial.
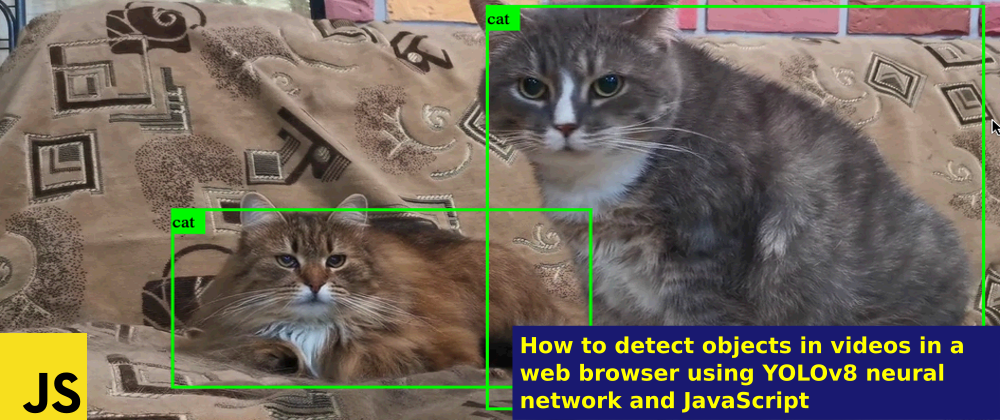
In the next sections, we will create a web application that will detect objects in a video, loaded to a web browser. It will display the bounding boxes of detected objects in real time. The final app will look and work as shown in the next video.
Ensure that you read and tried all previous articles of this series, especially How to detect objects on images using JavaScript section because I will reuse algorithms and source code of the project, developed there.
After refresh your knowledge on how to use the YOLOv8 neural network to detect objects on images in a web browser, you will be ready to continue reading the sections below.
Adding a video component to a web page
Let's start a project now. Create a new folder and add the index.html file to it with the following content:
index.html
<!DOCTYPE html>
<html lang="en">
<head>
    <meta charset="UTF-8">
    <title>Object detector</title>
</head>
<body>
<video src="sample.mp4" controls></video>
</body>
</html>
We use a <video> element to display the video on a web page. This element can display video from various sources, including files, web cameras or remote media streams that come from WebRTC. In this article we will use video from a file, but the object detection code will work for any other video source, supported by the <video> component. I used the sample.mp4 which is a nice recording with two cats. You can download it from here, or use any other MP4 video for testing. Place the video file in the same folder with the index.html.
The video element has many attributes. We used the src to specify the source video file and the controls attribute to display the control bar with play and other buttons. The full list of the video tag options, you can find here.
When you open this web page, you'll see the following:

You can see that it displays the video and a bottom panel, that can be used to control the video: play/pause, change audio volume, display in a full screen mode and so on.
Also, you can manage this component from JavaScript code. To get access to the video element from your code, you need to get a link to the video object:
const video = document.querySelector("video");
Then you can use the video object to programmatically control the video. This variable is an instance of the HTMLVideoElement object that implements the HTMLMediaElement interface. This object contains a set of properties and methods to control the video element. Also, it provides access to the video lifecycle events. You can bind event handlers to react to many different events, in particular:
- loadeddata - fired when the video loaded and displayed the first frame
- play - fired when video starts playing
- pause -fired when video paused
You can use these events to capture video frames. Before capture the frames, you need to know the dimensions of the video: the width and height. Let's get this right after video is loaded.
Create a JavaScript file with object_detector.js name and include it to the index.html:
index.html
<!DOCTYPE html>
<html lang="en">
<head>
    <meta charset="UTF-8">
    <title>Object detector</title>
</head>
<body>
<video src="sample.mp4" controls></video>
<script src="object_detector.js" defer></script>
</body>
</html>
and add the following to the new file:
object_detector.js
const video = document.querySelector("video");

video.addEventListener("loadeddata", () => {
    console.log(video.videoWidth, video.videoHeight);
})
In this code snippet, you set up the event listener for loadeddata event of the video. As soon, as video file loaded to the video element, the dimensions of video become available, and you print the videoWidth and videoHeight to the console.
If you used the sample.mp4 video file, then you should see the following size on the console.
960 540
If it works, then everything ready to capture the video frames.
Capture video frames for object detection
As you should read in the previous article, to detect objects on an image, you need to convert the image to the array of normalized pixel colors. To do that, we drew the image on HTML5 canvas, using the drawImage method and then, we used the getImageData method of HTML5 Canvas context to get access to the pixels and their color components.
The great thing about the drawImage method, is that you can use it to draw video on the canvas the same way as you used it to draw the image.
Let's see how it works. Add the <canvas> element to the index.html page:
index.html
<!DOCTYPE html>
<html lang="en">
<head>
    <meta charset="UTF-8">
    <title>Object detector</title>
</head>
<body>
<video src="sample.mp4" controls></video>
<br/>
<canvas></canvas>
<script src="object_detector.js" defer></script>
</body>
</html>
The video component starts playing the video when user presses the "Play" button, or if the developer calls the play() method on the video object. That is why, to start capturing the video, you need to implement the play event listener. Replace the content of object_detector.js file to the following:
object_detector.js
const video = document.querySelector("video");

video.addEventListener("play", () => {
    const canvas = document.querySelector("canvas");
    canvas.width = video.videoWidth;
    canvas.height = video.videoHeight;
    const context = canvas.getContext("2d");
    context.drawImage(video,0,0);
});
In this code, when the video starts playing:
- The "play" event listener triggered.
- In the event handling function, we set up the
canvaselement with actual width and height of video - Next code obtains the access to the 2d HTML5 canvas drawing
context - Then, using the
drawImagemethod, we draw the video on the canvas.
Open the index.html page in a web browser and press "Play" button. After this, you should see the following:

Here you see the video on the top and the canvas with captured frame below it. The canvas shows only the first frame, because you captured the frame only once, when the video started. To capture each frame, you need to call the drawImage all the time while the video is playing. You can use the setInterval function to call specified code repeatedly. Let's draw the current frame of video every 30 milliseconds:
object_detector.js
let interval;
video.addEventListener("play", () => {
    const canvas = document.querySelector("canvas");
    const context = canvas.getContext("2d");
    const interval = setInterval(() => {
        context.drawImage(video,0,0);
    },30)
});
In this code we draw the current frame of video while it is playing. But we should stop this process if the video stops playing, because there is no sense to redraw the canvas all the time if video paused or ended. To do this, I saved the created interval to the interval variable, that can be used later in the clearInterval function.
To intercept a moment when video stopped playing, you need to handle the pause event. Add the following to your code to stop capturing frames when video stopped playing:
object_detector.js
video.addEventListener("pause", () => {
    clearInterval(interval);
});
After this is done, you can reload your page. If everything done correctly, when you press the "play" button, you'll see that both the video and the canvas synchronized.

The code in the setInterval function will capture and draw each frame on the canvas until the video is playing. If you press the "Pause" button, or video ended, the pause event handler will clear the interval and stop the frame capturing loop.
We do not need to display the same video two times on a web page, so we will customize our player. Let's hide the original video player and leave only the canvas.
index.html
<video controls style="display:none" src="sample.mp4"></video>
However, if we hide the video player, then we do not have access to the "Play" and "Pause" buttons. Fortunately, it's not a big problem because you can control the video object programmatically. It has the play and pause methods to control the playback. We will add our own "Play" and "Pause" buttons below the canvas, and this is how the new UI will look:
index.html
<video controls style="display:none" src="sample.mp4"></video><br/>
<canvas></canvas><br/>
<button id="play">Play</button>
<button id="pause">Pause</button>
Now add the onclick event handlers for created buttons to the object_detector.js:
object_detector.js
const playBtn = document.getElementById("play");
const pauseBtn = document.getElementById("pause");
playBtn.addEventListener("click", () => {
    video.play();
});
pauseBtn.addEventListener("click", () => {
    video.pause();
});
Refresh the page after those changes to see the result:

You should be able to start playback by pressing the "Play" button and stop it by pressing the "Pause" button.
Here is a full JavaScript code of the current stage:
object_detector.js
const video = document.querySelector("video");
let interval
video.addEventListener("play", () => {
    const canvas = document.querySelector("canvas");
    const context = canvas.getContext("2d");
    interval = setInterval(() => {
        context.drawImage(video,0,0);

    },30)
});

video.addEventListener("pause", () => {
    clearInterval(interval);
});

const playBtn = document.getElementById("play");
const pauseBtn = document.getElementById("pause");
playBtn.addEventListener("click", () => {
    video.play();
});
pauseBtn.addEventListener("click", () => {
    video.pause();
});
Now you have custom video player and full control over each frame of the video. You can, for example, draw whatever you want on the canvas on top of any video frame using the HTML5 Canvas context API. In the sections below, we will pass each frame to YOLOv8 neural network to detect all objects on it and draw bounding boxes around them. We will use the same code, that we wrote in the previous article, when develop JavaScript object detection web service to prepare the input, run the model, process the output and draw bounding boxes around detected objects.
Detect objects in video
To detect objects in video, you need to detect objects on each frame of the video. You already converted each frame to the image and displayed it on the HTML5 canvas. Everything is ready to reuse the code, which we wrote in the previous article, to detect objects on image. For each video frame you need:
- Prepare the input from the image on the canvas
- Run the model with this input
- Process the output
- Display bounded boxes of detected objects on top of each frame
Prepare the input
Let's create a prepare_input function that will be used to prepare the input for the neural network model. This function will receive the canvas with displayed frame as an image and will do the following with it:
- create a temporary canvas and resize it to 640x640, which is required for YOLOv8 model
- copy the source image (canvas) to this temporary canvas
- get array of pixel color components using the
getImageDatamethod of HTML5 canvas context - collect Red, Green and Blue color components of each pixel to separate arrays
- Concatenate these arrays to a single one in which reds go first, greens go next and blues go last.
- Return this array
Let's implement this function:
object_detector.js
function prepare_input(img) {
    const canvas = document.createElement("canvas");
    canvas.width = 640;
    canvas.height = 640;
    const context = canvas.getContext("2d");
    context.drawImage(img, 0, 0, 640, 640);

    const data = context.getImageData(0,0,640,640).data;
    const red = [], green = [], blue = [];
    for (let index=0;index<data.length;index+=4) {
        red.push(data[index]/255);
        green.push(data[index+1]/255);
        blue.push(data[index+2]/255);
    }
    return [...red, ...green, ...blue];
}
In the first part of the function, we created an invisible canvas of 640x640 size and displayed the input image on it with resizing to 640x640.
Then, we got access to the canvas pixels data, collected color components to green, red and blue arrays, joined them together and returned. This process displayed on the next image.

Also, we normalized each color component value, dividing it by 255.
This function is very similar to the prepare_input function, created in the previous article. The only difference that we do not need to create an HTML element for the image here, because the image already exists on the input canvas.
When this function is ready, you can pass each frame to it and receive the array to use as an input for the YOLOv8 model. Add the call to this function to the setInterval loop:
object_detector.js
interval = setInterval(() => {
    context.drawImage(video,0,0);
    const input = prepare_input(canvas);
},30)
Here, right after drawing the frame on the canvas, you passed this canvas with image on it to the prepare_input function, that returns an array of red, green and blue color components of all pixels of this frame. This array will be used as an input for the YOLOv8 neural network model.
Run the model
When the input is ready, it's time to pass it to the neural network. We will not create a backend for this, everything will work in frontend. We will use the JavaScript version of ONNX runtime library to run the model predictions right in a browser. Include the ONNX runtime Javascript library to the index.html file to load it.
index.html
<script src="https://cdn.jsdelivr.net/npm/onnxruntime-web/dist/ort.min.js"></script>
Then, you need to get the YOLOv8 model and convert it to ONNX format. Do this as explained in this section of the previous article. Copy the exported .onnx file to the same folder with the index.html.
Then, let's write a function run_model that will instantiate a model using the .oonx file, then will pass the input, prepared in the above section to the model and will return the raw predictions:
object_detector.js
async function run_model(input) {
    const model = await ort.InferenceSession.create("yolov8n.onnx");
    input = new ort.Tensor(Float32Array.from(input),[1, 3, 640, 640]);
    const outputs = await model.run({images:input});
    return outputs["output0"].data;
}
This code just copy/pasted from the appropriate section of the previous article. Read more to refresh your knowledge about how it works.
Here I used the yolov8n.onnx model, which is a tiny version of pretrained YOLOv8 model on COCO dataset. You can use any other pretrained or custom model here.
Finally, call this function in your setInterval loop to detect objects on each frame:
object_detector.js
interval = setInterval(async() => {
    context.drawImage(video,0,0);
    const input = prepare_input(canvas);
    const output = await run_model(input)
},30)
Notice that I added the async keyword for a function inside setInterval and await keyword when call the run_model, because this is an async function that requires some time to finish execution.
To make it working, you need to run the index.html in some HTTP server, for example in the embedded web server of VS Code, because the run_model function requires downloading the yolov8n.onnx file to the browser using HTTP.
Now, it's time to convert the raw YOLOv8 model output to bounding boxes of detected objects.
Process the output
You can just copy the process_output function from the appropriate section of the previous article.
object_detector.js
function process_output(output, img_width, img_height) {
    let boxes = [];
    for (let index=0;index<8400;index++) {
        const [class_id,prob] = [...Array(80).keys()]
            .map(col => [col, output[8400*(col+4)+index]])
            .reduce((accum, item) => item[1]>accum[1] ? item : accum,[0,0]);
        if (prob < 0.5) {
            continue;
        }
        const label = yolo_classes[class_id];
        const xc = output[index];
        const yc = output[8400+index];
        const w = output[2*8400+index];
        const h = output[3*8400+index];
        const x1 = (xc-w/2)/640*img_width;
        const y1 = (yc-h/2)/640*img_height;
        const x2 = (xc+w/2)/640*img_width;
        const y2 = (yc+h/2)/640*img_height;
        boxes.push([x1,y1,x2,y2,label,prob]);
    }

    boxes = boxes.sort((box1,box2) => box2[5]-box1[5])
    const result = [];
    while (boxes.length>0) {
        result.push(boxes[0]);
        boxes = boxes.filter(box => iou(boxes[0],box)<0.7);
    }
    return result;
}
This code written for YOLOv8 model pretrained on COCO dataset with 80 object classes. If you use custom model with different number of classes, then you should replace "80" in the [...Array(80).keys()] line to the number of classes that your model detects.
Also, copy helper functions used to implement "Intersection over union" algorithm and array of COCO object class labels:
object_detector.js
function iou(box1,box2) {
    return intersection(box1,box2)/union(box1,box2);
}

function union(box1,box2) {
    const [box1_x1,box1_y1,box1_x2,box1_y2] = box1;
    const [box2_x1,box2_y1,box2_x2,box2_y2] = box2;
    const box1_area = (box1_x2-box1_x1)*(box1_y2-box1_y1)
    const box2_area = (box2_x2-box2_x1)*(box2_y2-box2_y1)
    return box1_area + box2_area - intersection(box1,box2)
}

function intersection(box1,box2) {
    const [box1_x1,box1_y1,box1_x2,box1_y2] = box1;
    const [box2_x1,box2_y1,box2_x2,box2_y2] = box2;
    const x1 = Math.max(box1_x1,box2_x1);
    const y1 = Math.max(box1_y1,box2_y1);
    const x2 = Math.min(box1_x2,box2_x2);
    const y2 = Math.min(box1_y2,box2_y2);
    return (x2-x1)*(y2-y1)
}

const yolo_classes = [
    'person', 'bicycle', 'car', 'motorcycle', 'airplane', 'bus', 'train', 'truck', 'boat',
    'traffic light', 'fire hydrant', 'stop sign', 'parking meter', 'bench', 'bird', 'cat', 'dog', 'horse',
    'sheep', 'cow', 'elephant', 'bear', 'zebra', 'giraffe', 'backpack', 'umbrella', 'handbag', 'tie', 'suitcase',
    'frisbee', 'skis', 'snowboard', 'sports ball', 'kite', 'baseball bat', 'baseball glove', 'skateboard',
    'surfboard', 'tennis racket', 'bottle', 'wine glass', 'cup', 'fork', 'knife', 'spoon', 'bowl', 'banana', 'apple',
    'sandwich', 'orange', 'broccoli', 'carrot', 'hot dog', 'pizza', 'donut', 'cake', 'chair', 'couch', 'potted plant',
    'bed', 'dining table', 'toilet', 'tv', 'laptop', 'mouse', 'remote', 'keyboard', 'cell phone', 'microwave', 'oven',
    'toaster', 'sink', 'refrigerator', 'book', 'clock', 'vase', 'scissors', 'teddy bear', 'hair drier', 'toothbrush'
];
Here I used the labels array for pretrained model on COCO dataset. If you use a different model, the labels obviously should be different.
Finally, call this function for each video frame in the setInterval loop:
object_detector.js
interval = setInterval(async() => {
        context.drawImage(video,0,0);
        const input = prepare_input(canvas);
        const output = await run_model(input);
        const boxes = process_output(output, canvas.width, canvas.height);
    },30)
The process_output function receives the raw model output and dimensions of the canvas to scale bounding boxes to the original image size. (Remember, that the model works with 640x640 images).
Finally, the boxes array contains the bounding boxes for each detected object in a format: [x1,y1,x2,y2,label,prob].
All that left to do is to draw these boxes on top of the image on the canvas.
Draw bounding boxes
Now you need to write a function that uses the HTML5 canvas context API to draw rectangles for each bounding box with object class labels. You can reuse the draw_image_and_boxes function that we wrote in each project in the previous article. This is how the original function looks:
function draw_image_and_boxes(file,boxes) {
    const img = new Image()
    img.src = URL.createObjectURL(file);
    img.onload = () => {
        const canvas = document.querySelector("canvas");
        canvas.width = img.width;
        canvas.height = img.height;
        const ctx = canvas.getContext("2d");
        ctx.drawImage(img,0,0);
        ctx.strokeStyle = "#00FF00";
        ctx.lineWidth = 3;
        ctx.font = "18px serif";
        boxes.forEach(([x1,y1,x2,y2,label]) => {
            ctx.strokeRect(x1,y1,x2-x1,y2-y1);
            ctx.fillStyle = "#00ff00";
            const width = ctx.measureText(label).width;
            ctx.fillRect(x1,y1,width+10,25);
            ctx.fillStyle = "#000000";
            ctx.fillText(label, x1, y1+18);
        });
    }
}
However, you can simplify it, because in this case you do not need to load the image from file and then display it on the canvas, because you already have the image, displayed on the canvas. You just need to pass the canvas to this function and draw boxes on it. Also, rename the function to draw_boxes, because the image already drawn on the input canvas. This is how you can modify it:
object_detector.js
function draw_boxes(canvas,boxes) {
    const ctx = canvas.getContext("2d");
    ctx.strokeStyle = "#00FF00";
    ctx.lineWidth = 3;
    ctx.font = "18px serif";
    boxes.forEach(([x1,y1,x2,y2,label]) => {
        ctx.strokeRect(x1,y1,x2-x1,y2-y1);
        ctx.fillStyle = "#00ff00";
        const width = ctx.measureText(label).width;
        ctx.fillRect(x1,y1,width+10,25);
        ctx.fillStyle = "#000000";
        ctx.fillText(label, x1, y1+18);
    });
}
- The function receives the
canvaswith current frame and theboxesarray of detected objects on it. - The function setup fill, stroke and font style.
- Then it traverses the
boxesarray. It draws the green bounding rectangle around each detected object and the class label. To display the class label, it uses black text and green background.
Now you can call this function for each frame in the setInterval loop this way:
object_detector.js
interval = setInterval(async() => {
     context.drawImage(video,0,0);
     const input = prepare_input(canvas);
     const output = await run_model(input);
     const boxes = process_output(output, canvas.width, canvas.height);
     draw_boxes(canvas,boxes)
 },30)
However, the code written this way will not work correctly. The draw_boxes is the last line in the cycle, so, right after this line, the next iteration will start and will overwrite the displayed boxes by context.drawImage(video, 0,0, canvas.width, canvas.height) line. So, you will never see the displayed boxes. You need to drawImage first, and draw_boxes next, but current code will do this in opposite order. We will use the following trick to fix it:
object_detector.js
let interval
let boxes = [];
video.addEventListener("play", async() => {
    const canvas = document.querySelector("canvas");
    canvas.width = video.videoWidth;
    canvas.height = video.videoHeight;
    const context = canvas.getContext("2d");
    interval = setInterval(async() => {
        context.drawImage(video,0,0);
        draw_boxes(canvas, boxes);
        const input = prepare_input(canvas);
        const output = await run_model(input);
        boxes = process_output(output, canvas.width, canvas.height);
    },30)
});
In this code snippet, I declared the boxes as a global variable, before the "play" event handler. It is an empty array by default. This way, you can run the draw_boxes function right after drawing the video frame on the canvas with drawImage function. On the first iteration it will draw nothing on top of the image, but then, it will run the model and overwrite the boxes array with detected objects. Then it will draw the bounding boxes of detected objects in the beginning of the next iteration. Assuming that you do iteration each 30 milliseconds, the difference between previous and current frames won't be significant.
Finally, if everything implemented correctly, you will see the video with bounding boxes around detected objects.

Perhaps when you run this, you'll experience annoying delays in video. The machine learning model inference in the run_model function is a CPU intensive operation, that can require more time, than 30 milliseconds. That is why it interrupts the video. The delay duration depends on your CPU power. Fortunately, there is a way to fix it, that we will cover below.
Running several tasks in parallel in JavaScript
The JavaScript is single threaded by default. It has a main thread, or, sometimes, it's called the UI thread. All your code runs in it. However, it's not a good practice to interrupt UI by CPU intensive tasks, like machine learning model execution. You should move CPU intensive tasks to separate threads to not block the user interface.
A common way to create threads in JavaScript is using the WebWorkers API. Using this API, you can create a Worker object and pass the JavaScript file to it, like in this code:
const worker = new Worker("worker.js");
The worker object will run the worker.js file in a separate thread. All code inside this file will run in parallel with the user interface.
The worker threads spawned this way do not have any access to web page elements or to any code, defined in it. The same for the main thread, it does not have any access to the content of the worker thread. To communicate between threads, the WebWorkers API uses messages. You can send message with data to a thread, and listen for messages from it.
The worker thread can do the same: it can send messages to the main thread and listen for messages from the main thread. The communication defined this way is asynchronous.
For example, to send a message to the worker thread, that you created before, you should run:
worker.postMessage(data)
The data argument is any JavaScript object.
To listen messages from the worker thread, you need to define the onmessage event handler:
worker.onmessage = (event) => {
    console.log(event.data);
};
When the message comes from the worker, it triggers the function and passes the incoming message inside the event argument. The event.data property contains the data, that the worker thread sent using the postMessage function.
You can read more theory about WebWorkers in the documentation, and then we will move to practice.
Let's solve the problem with video delays. The most time and resource consuming function that we have is the run_model. So, we will move it to a new worker thread. Then, we will send the input to this thread and will receive the output from it. It will work in a background for each frame while the video is playing.
Running the model in a background thread
Let's create a worker.js file and move the code, that required to run the model, to this file:
worker.js
importScripts("https://cdn.jsdelivr.net/npm/onnxruntime-web/dist/ort.min.js");

async function run_model(input) {
    const model = await ort.InferenceSession.create("./yolov8n.onnx");
    input = new ort.Tensor(Float32Array.from(input),[1, 3, 640, 640]);
    const outputs = await model.run({images:input});
    return outputs["output0"].data;
}
The first line imports the ONNX runtime JavaScript API library, because, as said before, the worker thread does not have access to a web page and to anything that imported in it. The importScripts function used to import external scripts to the worker thread.
The JavaScript ONNX API library imported here contains only high level JavaScript functions, but not the ONNX runtime library itself. The ONNX runtime library for JavaScript is a WebAssembly compilation of the original ONNX runtime, that written in C. When you import that ort.min.js file and open a web page with it, it checks if the real ONNX library exists in the project folder, and if not, it automatically downloads the ort-wasm-simd.wasm file to your web browser. I experienced a problem with it. If run this from web worker, it does not download this file. I think, the best quick fix for this is to manually download the ort-wasm-simd.wasm file from repository and put it to the project folder.
Following this, I copy/pasted the run_model function from object_detector.js.
Now we need to send input to this script from the main UI thread where all other code works. To do this, we need to create a new worker in the object_detector.js. You can do this in the beginning:
object_detector.js
const worker = new Worker("worker.js")
Then, instead of the run_model call, you need to post a message with the input to this worker.
object_detector.js
interval = setInterval(() => {
        context.drawImage(video,0,0, canvas.width, canvas.height);
        draw_boxes(canvas, boxes);
        const input = prepare_input(canvas);
        worker.postMessage(input);
//        boxes = process_output(output, canvas.width, canvas.height);
    },30)
Here I have sent the input to the worker using the postMessage function and commented all code after it, because we should run it only after the worker processes the input and returns the output. You can just remove this line, because it will be used later in other function, where we will process the messages from the worker thread.
Let's return to the worker now. It should receive the input, that you sent. To receive messages, you need to define the onmessage handler. Let's add it to the worker.js:
worker.js
onmessage = async(event) => {
    const input = event.data;
    const output = await run_model(input);
    postMessage(output);
}
This is how the event handler for messages from the main thread should be implemented in the worker thread. The handler is defined as an async function. When the message comes, it extracts the data from the message to the input variable. Then it calls the run_model with this input. Finally, it sends the output from the model to the main thread as a message, using the postMessage function.
worker.js
onmessage = async(event) => {
    const input = event.data;
    const output = await run_model(input);
    postMessage(output);
}
When the model returned the output and sent it to the main thread as a message, the main thread should receive this message and process the output from the model. To do this, you need to define the onmessage handler for the worker thread in the object_detector.js.
object_detector.js
worker.onmessage = (event) => {
    const output = event.data;
    const canvas = document.querySelector("canvas");
    boxes =  process_output(output, canvas.width, canvas.height);
};
Here, when output from the model comes from the worker thread, you process it using the process_output function and save it to the boxes global variable. So, the new boxes will be available to draw.
Almost done, but one more important thing should be done. The message flow between main and worker threads goes asynchronously, so, the main thread will not wait until the run_model in the worker thread finishes and will continue sending new frames to the worker thread every 30 milliseconds. It can result in a huge request queue, especially if the user has slow CPU. I recommend do not send all new requests to the worker thread until it works with the current one. This can be implemented the following way:
Here I defined a busy variable which acts as a semaphore. When the main thread sends a message arrives, it sets the busy variable to true to signal that the message processing started. Then, all subsequent requests will be ignored until the previous one processed and returned. At this moment, the value of the busy variable resets to false.
The process, that we defined, will work in parallel with a main video playing loop. Here is a full source of the object_detector.js:
object_detector.js
const video = document.querySelector("video");

const worker = new Worker("worker.js");
let boxes = [];
let interval
let busy = false;
video.addEventListener("play", () => {
    const canvas = document.querySelector("canvas");
    canvas.width = video.videoWidth;
    canvas.height = video.videoHeight;
    const context = canvas.getContext("2d");
    interval = setInterval(() => {
        context.drawImage(video,0,0);
        draw_boxes(canvas, boxes);
        const input = prepare_input(canvas);
        if (!busy) {
            worker.postMessage(input);
            busy = true;
        }
    },30)
});

worker.onmessage = (event) => {
    const output = event.data;
    const canvas = document.querySelector("canvas");
    boxes =  process_output(output, canvas.width, canvas.height);
    busy = false;
};

video.addEventListener("pause", () => {
    clearInterval(interval);
});

const playBtn = document.getElementById("play");
const pauseBtn = document.getElementById("pause");
playBtn.addEventListener("click", () => {
    video.play();
});
pauseBtn.addEventListener("click", () => {
    video.pause();
});

function prepare_input(img) {
    const canvas = document.createElement("canvas");
    canvas.width = 640;
    canvas.height = 640;
    const context = canvas.getContext("2d");
    context.drawImage(img, 0, 0, 640, 640);
    const data = context.getImageData(0,0,640,640).data;
    const red = [], green = [], blue = [];
    for (let index=0;index<data.length;index+=4) {
        red.push(data[index]/255);
        green.push(data[index+1]/255);
        blue.push(data[index+2]/255);
    }
    return [...red, ...green, ...blue];
}

function process_output(output, img_width, img_height) {
    let boxes = [];
    for (let index=0;index<8400;index++) {
        const [class_id,prob] = [...Array(yolo_classes.length).keys()]
            .map(col => [col, output[8400*(col+4)+index]])
            .reduce((accum, item) => item[1]>accum[1] ? item : accum,[0,0]);
        if (prob < 0.5) {
            continue;
        }
        const label = yolo_classes[class_id];
        const xc = output[index];
        const yc = output[8400+index];
        const w = output[2*8400+index];
        const h = output[3*8400+index];
        const x1 = (xc-w/2)/640*img_width;
        const y1 = (yc-h/2)/640*img_height;
        const x2 = (xc+w/2)/640*img_width;
        const y2 = (yc+h/2)/640*img_height;
        boxes.push([x1,y1,x2,y2,label,prob]);
    }
    boxes = boxes.sort((box1,box2) => box2[5]-box1[5])
    const result = [];
    while (boxes.length>0) {
        result.push(boxes[0]);
        boxes = boxes.filter(box => iou(boxes[0],box)<0.7 || boxes[0][4] !== box[4]);
    }
    return result;
}

function iou(box1,box2) {
    return intersection(box1,box2)/union(box1,box2);
}

function union(box1,box2) {
    const [box1_x1,box1_y1,box1_x2,box1_y2] = box1;
    const [box2_x1,box2_y1,box2_x2,box2_y2] = box2;
    const box1_area = (box1_x2-box1_x1)*(box1_y2-box1_y1)
    const box2_area = (box2_x2-box2_x1)*(box2_y2-box2_y1)
    return box1_area + box2_area - intersection(box1,box2)
}

function intersection(box1,box2) {
    const [box1_x1,box1_y1,box1_x2,box1_y2] = box1;
    const [box2_x1,box2_y1,box2_x2,box2_y2] = box2;
    const x1 = Math.max(box1_x1,box2_x1);
    const y1 = Math.max(box1_y1,box2_y1);
    const x2 = Math.min(box1_x2,box2_x2);
    const y2 = Math.min(box1_y2,box2_y2);
    return (x2-x1)*(y2-y1)
}

function draw_boxes(canvas,boxes) {
    const ctx = canvas.getContext("2d");
    ctx.strokeStyle = "#00FF00";
    ctx.lineWidth = 3;
    ctx.font = "18px serif";
    boxes.forEach(([x1,y1,x2,y2,label]) => {
        ctx.strokeRect(x1,y1,x2-x1,y2-y1);
        ctx.fillStyle = "#00ff00";
        const width = ctx.measureText(label).width;
        ctx.fillRect(x1,y1,width+10,25);
        ctx.fillStyle = "#000000";
        ctx.fillText(label, x1, y1+18);
    });
}

const yolo_classes = [
    'person', 'bicycle', 'car', 'motorcycle', 'airplane', 'bus', 'train', 'truck', 'boat',
    'traffic light', 'fire hydrant', 'stop sign', 'parking meter', 'bench', 'bird', 'cat', 'dog', 'horse',
    'sheep', 'cow', 'elephant', 'bear', 'zebra', 'giraffe', 'backpack', 'umbrella', 'handbag', 'tie', 'suitcase',
    'frisbee', 'skis', 'snowboard', 'sports ball', 'kite', 'baseball bat', 'baseball glove', 'skateboard',
    'surfboard', 'tennis racket', 'bottle', 'wine glass', 'cup', 'fork', 'knife', 'spoon', 'bowl', 'banana', 'apple',
    'sandwich', 'orange', 'broccoli', 'carrot', 'hot dog', 'pizza', 'donut', 'cake', 'chair', 'couch', 'potted plant',
    'bed', 'dining table', 'toilet', 'tv', 'laptop', 'mouse', 'remote', 'keyboard', 'cell phone', 'microwave', 'oven',
    'toaster', 'sink', 'refrigerator', 'book', 'clock', 'vase', 'scissors', 'teddy bear', 'hair drier', 'toothbrush'
];
And this is the worker thread code:
worker.js
importScripts("https://cdn.jsdelivr.net/npm/onnxruntime-web/dist/ort.min.js");

onmessage = async(event) => {
    const input = event.data;
    const output = await run_model(input);
    postMessage(output);
}

async function run_model(input) {
    const model = await ort.InferenceSession.create("./yolov8n.onnx");
    input = new ort.Tensor(Float32Array.from(input),[1, 3, 640, 640]);
    const outputs = await model.run({images:input});
    return outputs["output0"].data;
}
Also, you can remove the ONNX runtime library import from the index.html, because it's imported in the worker.js. This is the final index.html file:
index.html
<!DOCTYPE html>
<html lang="en">
<head>
<meta charset="UTF-8">
<title>Object detector</title>
</head>
<body>
<video controls style="display:none" src="sample.mp4"></video>
<br/>
<canvas></canvas><br/>
<button id="play">Play</button>
<button id="pause">Pause</button>
<script src="object_detector.js" defer></script>
</body>
</html>
If you run the index.html file now in a web server, you should see the following result.
Conclusion
In this article I showed how to detect objects in video using the YOLOv8 neural network right in a web browser, without any backend. We used the <video> HTML element to load the video. Then we used the HTML5 Canvas to capture each individual frame and convert it to input tensor for YOLOv8 model. Finally we sent this input tensor to the model and received the array of detected objects.
In addition, we discovered how to run several tasks in parallel in Javascript, using web workers. This way we moved the machine learning model execution code to background thread, to not interrupt the user interface with this CPU intensive task.
The full source code of this article you can find in this repository.
Using the algorithm, explained in this post you can detect objects not only in video files, but in other sources of video, like, for example in a video from web camera. All that you need to change in this project, is to set a web camera as a source for <video> element. Everything else will stay the same. This is just a few lines of code. You can read how to connect the webcam to the video element in this article.
The project created in this article is not a complete production ready solution. There is a lot to improve here. For example, you can increase the speed and accuracy if you use object tracking algorithms which work faster. Instead of running the neural network for each frame to detect the same objects, you can run it only for the first frame, to get initial object positions and then use object tracking algorithms to track detected bounding boxes on the subsequent frames. Read more about object tracking methods here. I will write more about this in next articles.
Follow me on LinkedIn, Twitter, and Facebook to know first about new articles like this one and other software development news.
Have a fun coding and never stop learning!