I wrote last week on how the data science industry is moving towards a code-free landscape where some of the mundane and metrics driven tasks are being automated and intermediate decisions are being made for the data scientists. Don’t get me wrong. As a practicing data scientist, you still have to understand the different models, hyper parameters, and have an intuition about the whole process. You still will spend majority of your time cleaning up data and maintaining your models. Finally, until these tools get to a point where they are sophisticated enough to gain trust of data scientists, we will need a way to deploy hand written and opensource models that have been vetted by the community. A good example is the IBM Model Asset Exchange.
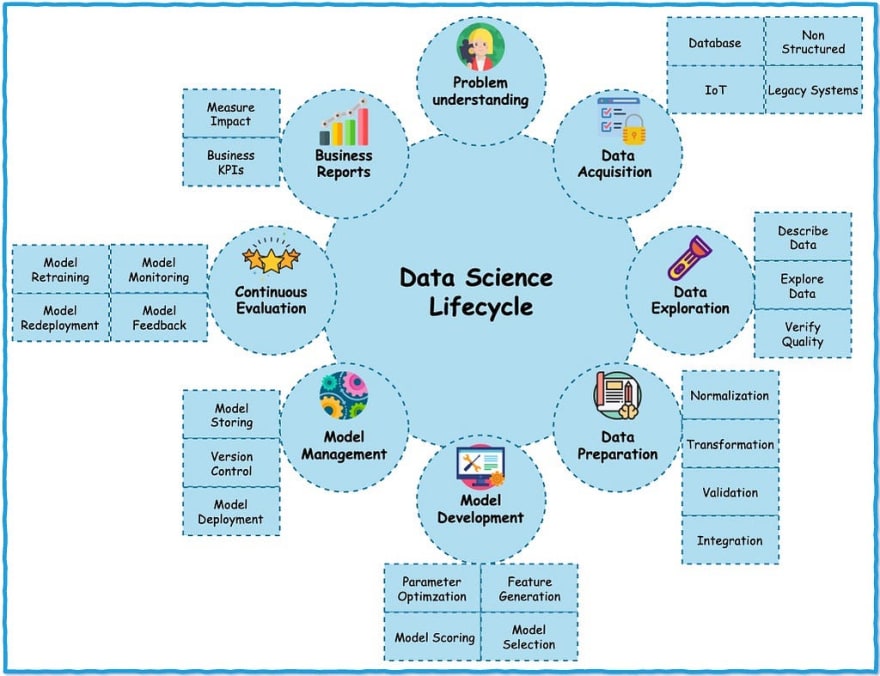
So let’s look at the same model that we automatically created in the last post using Watson Studio Model Builder feature. We will instead create a linear regression model using scikit-learn and then save, deploy and manage it on IBM Cloud. To recap, I proposed the following lifecycle for a data science project …
As before, we are looking at circles labeled Model Deployment and Model Management. I am purposely not doing any preprocessing or cleaning and skipping feature selection and model selection/scoring on the dataset for the sake of brevity. We will simply generate the simplest scikit-learn Linear Regression model as follows. You can grab the code from this github repository if you want to copy it in your project.
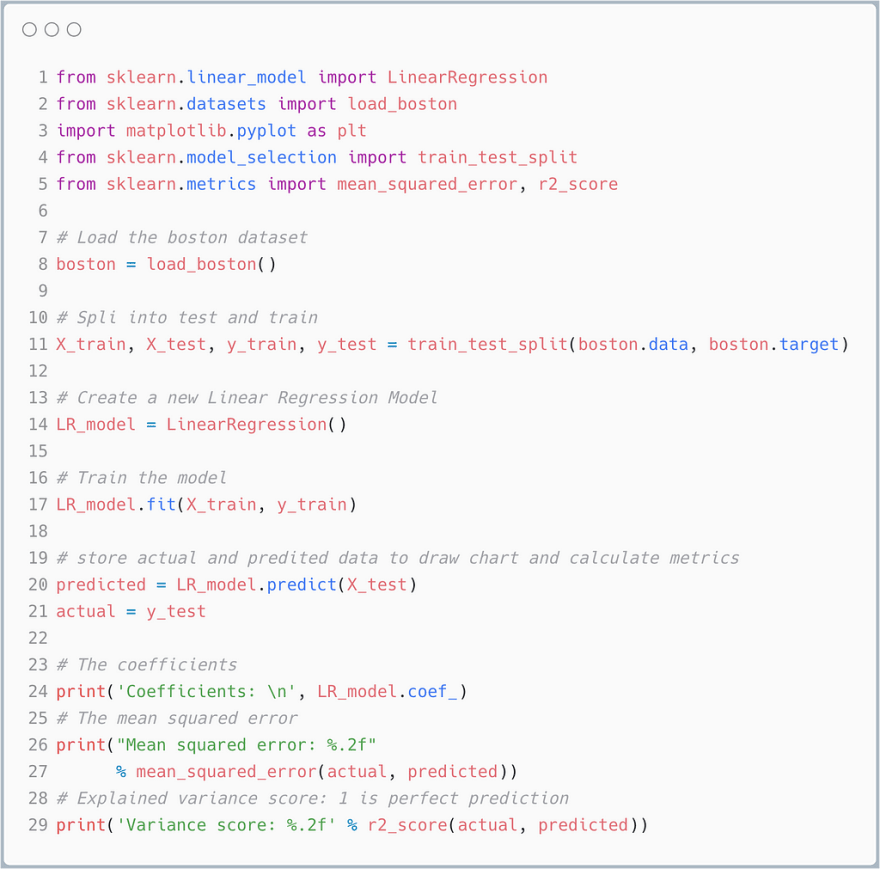
It’s not the greatest model as you can see from the metrics below. But it will do for now. The point is to be able to deploy your model.
Coefficients:
 [ -1.56053402e-01 5.13699772e-02 5.82438860e-02 2.01467441e+00
 -1.80634645e+01 3.87160744e+00 -5.82508110e-03 -1.52533524e+00
 2.88260126e-01 -1.14467685e-02 -9.77473854e-01 9.87278339e-03
 -5.31623043e-01]
Mean squared error: 33.03
Variance score: 0.69
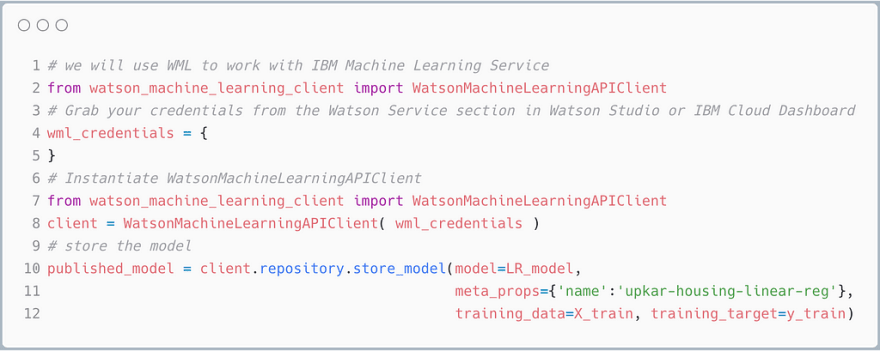
The next step is to save the model on IBM Cloud. The following code does exactly that …
Again, You can grab the code from this github repository if you want to copy it in your project. You can grab your service credentials from the Watson Machine Learning service under your account as shown here …
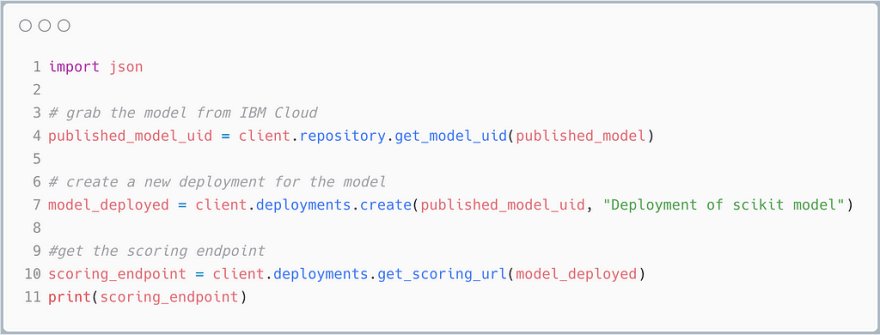
Finally, we will deploy the model as follows …
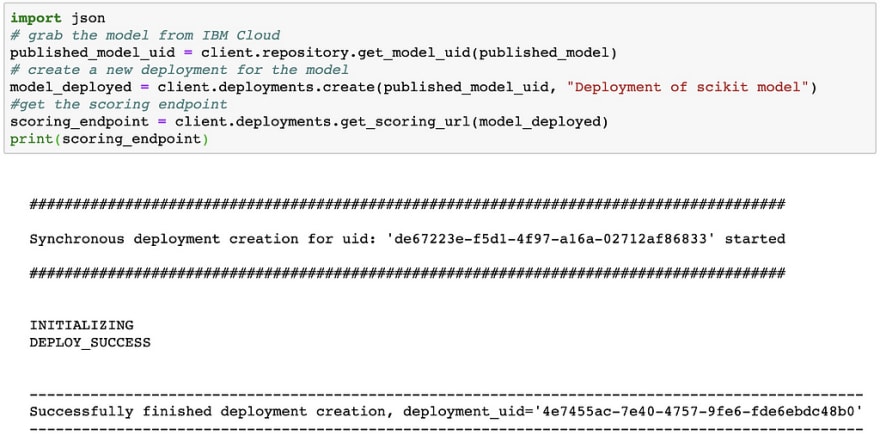
The cell should print out INITIALIZING and then DEPLOY_SUCCESS. It should also print out the scoring URL. I have removed it from the screenshot below.
That’s it ! You made it. You just deployed a scikit-learn model on IBM Cloud. It wasn’t the greatest model ever, but hey, it’s yours and your friends can use it now !
You can now predict/score against the model as follows …
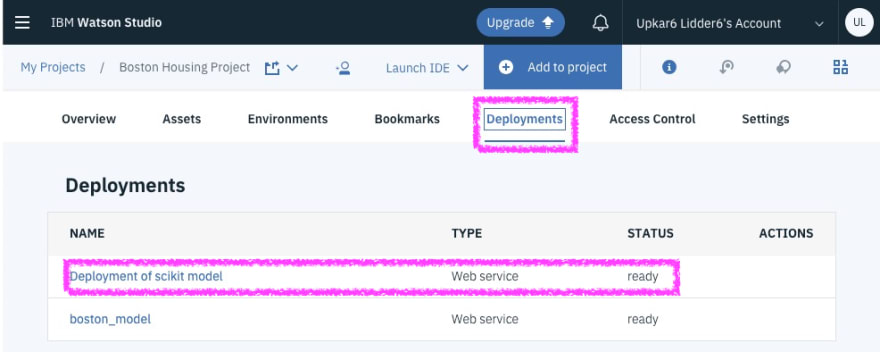
Finally, just to prove that I am not lying, you should see the deployed model in Watson Studio.
You can test the model by using the test tab inside the deployment as follows …
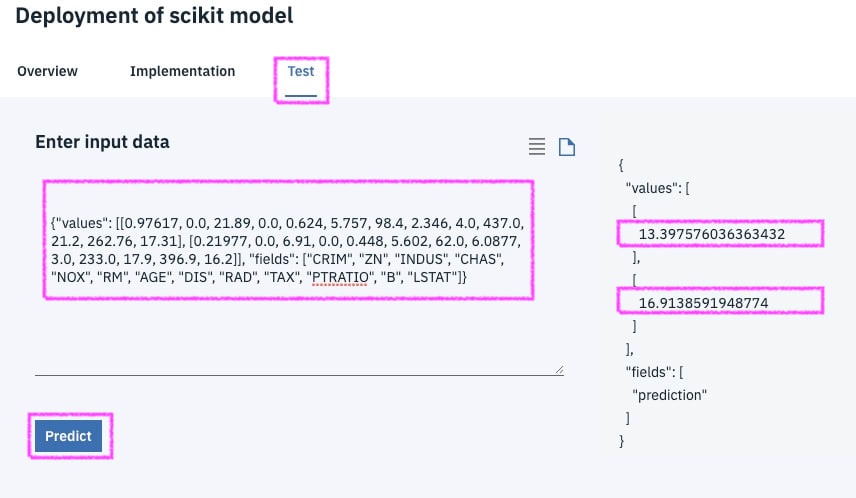
I got the JSON input from the boston test data as follows …
import json
testjson = {}
testjson['fields'] = list(boston.feature\_names)
testjson['values'] = [list(X\_test[0]), list(X\_test[1])]
json.dumps(testjson)
Results in …
{"values": [[0.97617, 0.0, 21.89, 0.0, 0.624, 5.757, 98.4, 2.346, 4.0, 437.0, 21.2, 262.76, 17.31], [0.21977, 0.0, 6.91, 0.0, 0.448, 5.602, 62.0, 6.0877, 3.0, 233.0, 17.9, 396.9, 16.2]], "fields": ["CRIM", "ZN", "INDUS", "CHAS", "NOX", "RM", "AGE", "DIS", "RAD", "TAX", "PTRATIO", "B", "LSTAT"]}
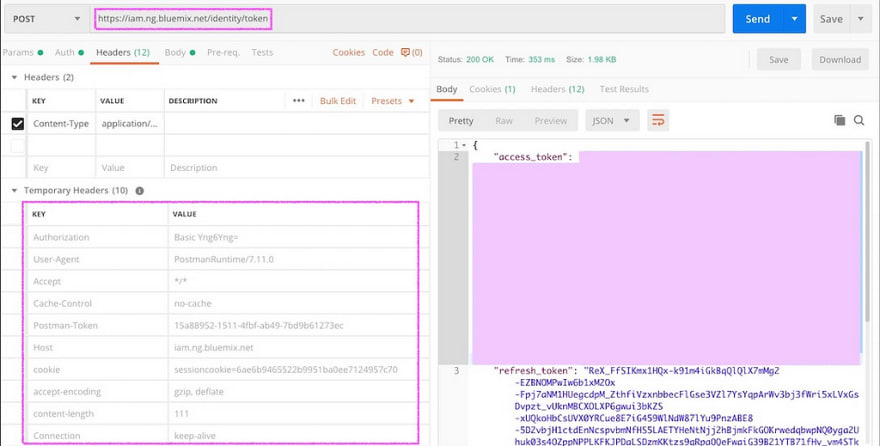
I also used postman to test the same model. The first step was to get the token from IBM Cloud
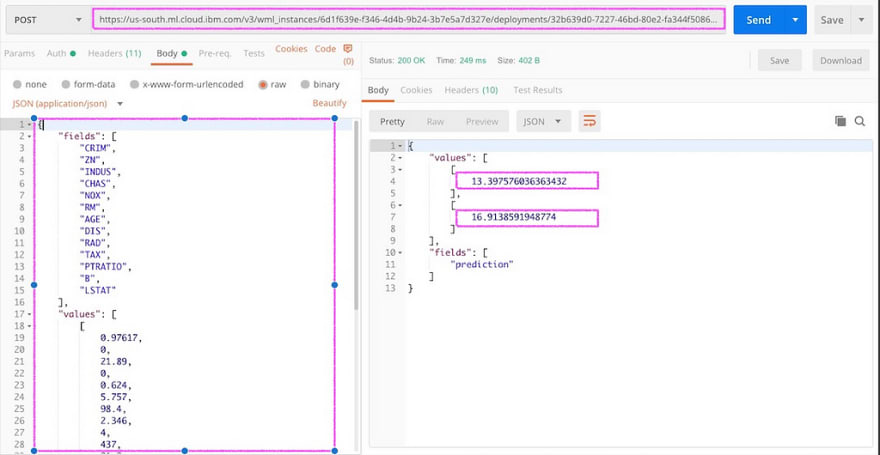
The second step is to use the scoring URL to make predictions using the token above in the Bearer Authorization.
Stay tuned for the next article in the series. We will look at some of the opensource deep learning models at IBM and use Node-RED to test them out. They are a lot of fun !
Next Steps
- Sign up for IBM Cloud and try it out for yourself ! -- http://bit.ly/waston-ml-sign
- You can also look at this in depth code pattern on Data Science Pipeline with Employee Attrition.
Thanks to Adam Massachi for hanging out at PyData LA and introducing me to WML ! Thanks to Max Katz for hosting our online meetup.

