Hello fellow developers on the internet. How're you all doing? I hope everyone is doing great today!. In this post, we're going to be building the best navigation menu with JavaScript that you can find on the internet. Nah I'm joking 🤣. It's simple but useful that you can learn a trick or 2 from. So let's started
Steps
1. Create the directory
mkdir navigation-bar
cd navigation-bar
code .
2. Create Starter Files
Create empty html, css, and javascript files
3. Markup the Skeleton of the App
<!DOCTYPE html>
<html lang="en">
<head>
    <meta charset="UTF-8">
    <meta http-equiv="X-UA-Compatible" content="IE=edge">
    <meta name="viewport" content="width=device-width, initial-scale=1.0">
    <link rel="stylesheet" href="./index.css">
    <title>Animation Navigation Menu</title>
</head>
<body>
    <header class="header">
        <div class="hamburger">
            <div class="hamburger__line"></div>
            <div class="hamburger__line"></div>
            <div class="hamburger__line"></div>
        </div>
        <div class="header__left">
            <a href="#" class="header__logo">RETRO</a>
            <div class="header__text-box">
                <h1 class="header__title">
                    <span class="header__title--top">
                        CREATIVE DESIGN
                    </span>
                    <span class="header__title--bottom">
                        INTRODUCING
                    </span>
                </h1>
                <div class="header__btns-box">
                    <button class="header__btn header__btn--1  btn btn--red">
                        Get Started
                    </button>
                    <button class="header__btn header__btn--2  btn btn--white">
                        Get Featured
                    </button>
                </div>
            </div>
        </div>
        <div class="header__right">
            <nav class="nav header__nav">
                <ul class="nav__list">
                    <li class="nav__item nav__item--1">
                        <a href="#" class="nav__link">HOME</a>
                    </li>
                    <li class="nav__item nav__item--2">
                        <a href="#" class="nav__link">GALLERY</a>
                    </li>
                    <li class="nav__item nav__item--3">
                        <a href="#" class="nav__link">CONTACT</a>
                    </li>
                    <li class="nav__item nav__item--4">
                        <a href="#" class="nav__link">LOCATION</a>
                    </li>
                    <li class="nav__item nav__item--5">
                        <a href="#" class="nav__link">TESTIMONIAL</a>
                    </li>
                    <li class="nav__item nav__item--6">
                        <a href="#" class="nav__link">PRICING</a>
                    </li>
                </ul>
            </nav>
        </div>
    </header>
    <script src="./index.js"></script>
</body>
</html>
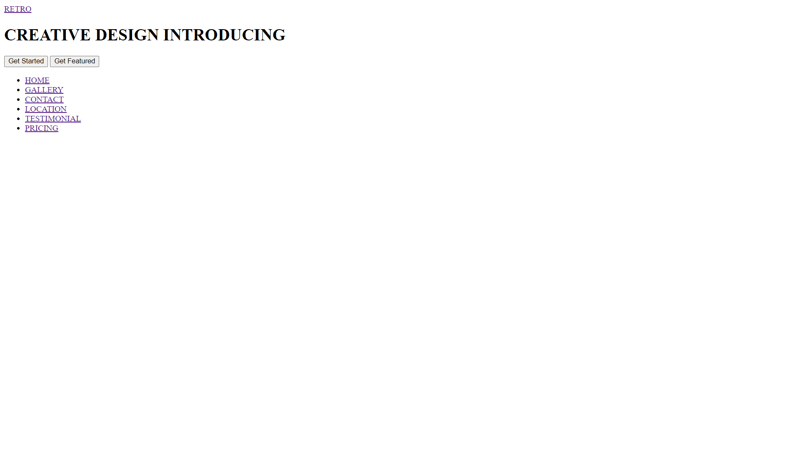
3. Open the live server and you should see following ugly texts
3. Now add the following styles
*,
*::before,
*::after {
    padding: 0;
    margin: 0;
    box-sizing: border-box;
}

body {
    font-family: Arial, Helvetica, sans-serif;
    color: #fff;
}

a,button {
    display: inline-block;
}
a {
    text-decoration: none;
}


/* btn */
.btn {
    padding: 15px 25px;
    border-radius: 30px;
    border: 0;
    background: #fff;
    font-size: 17px;
    cursor: pointer;
}
.btn--red {
    background: rgb(255, 0, 60);
    color: #fff;
}


/* header */
.header {
    display: flex;
    min-height: 100vh;
}
/* menu open styles */
.header.is-menu-open .header__left {
    -webkit-clip-path: polygon(0 0, 88% 0, 100% 100%, 0 100%);
    clip-path: polygon(0 0, 88% 0, 100% 100%, 0 100%);
}
.header.is-menu-open .header__right {
    min-width: 50%;
    max-width: 50%;
}
.header.is-menu-open .nav__item {
    visibility: visible;
    animation: animate .5s ease-out backwards;
    opacity: 1;
}
.header.is-menu-open .hamburger {
    background: #000;
}

/* mobile screen styles */
.header.is-menu-open.is-mobile-screen .header__left {
    -webkit-clip-path: polygon(0 0, 100% 0, 100% 100%, 0% 100%);
    clip-path: polygon(0 0, 100% 0, 100% 100%, 0% 100%);
    padding: 0;
    width: 0;
}
.header.is-menu-open.is-mobile-screen .header__right {
    min-width: 100%;
    max-width: 100%;
}
.header.is-menu-open.is-mobile-screen .hamburger {
    left: 40px;
    z-index: 9999;
    background: #000;
}


/* header left */
.header__left {
    flex: 1;
    padding: 40px 60px;
    width: 100%;
    background: url(https://images.unsplash.com/photo-1661961110671-77b71b929d52?ixlib=rb-4.0.3&ixid=MnwxMjA3fDF8MHxwaG90by1wYWdlfHx8fGVufDB8fHx8&auto=format&fit=crop&w=2070&q=80);
    background-position: center;
    background-blend-mode: multiply;
}
.header__logo {
    color: #fff;
    font-weight: 600;
    font-size: 1.5rem;
}
.header__text-box {
    position: absolute;
    top: 50%;
    transform: translateY(-50%);
}
.header__title--top, .header__title--bottom {
    display: block;
}
.header__title--top {
    font-size: clamp(1.5rem, calc(2vw + 1rem), 2.5rem);
}
.header__title--bottom {
    font-size: clamp(2.5rem, calc(3.5vw + 1rem), 4.5rem);
}
.header__btns-box {
    margin-top: 30px;
}
.header__btn--1 {
    border-top-right-radius: 0;
    border-bottom-right-radius: 0;
}
.header__btn--2 {
    border-top-left-radius: 0;
    border-bottom-left-radius: 0;
}


    /* header right */
.header__right {
    flex: 1;
    min-width: 0;
    max-width: 0;
    transition: all .3s ease-out;
}
.header__nav {
    position: absolute;
    top: 50%;
    right: 150px;
    transform: translateY(-50%);
}


/* hamburger menu */
.hamburger {
    position: fixed;
    top: 40px;
    right: 60px;
    height: 40px;
    width: 40px;
    display: flex;
    flex-direction: column;
    align-items: center;
    justify-content: center;
    border: 2px solid #fff;
    border-radius: 2px;
    cursor: pointer;
}
.hamburger__line {
    height: 3px;
    width: 20px;
    background: #fff;
}
.hamburger__line:not(:last-child) {
    margin-bottom: 5px;
}


/* nav */
.nav__list {
    list-style: none;
    text-align: right;
}
.nav__item {
    opacity: 0;
    visibility: hidden;
}
.header .nav .nav__item--1 {
    animation-delay: .1s;
}
.header .nav .nav__item--2 {
    animation-delay: .3s;
}
.header .nav .nav__item--3 {
    animation-delay: .6s;
}
.header .nav .nav__item--4 {
    animation-delay: .9s;
}
.header .nav .nav__item--5 {
    animation-delay: 1.2s;
}
.header .nav .nav__item--6 {
    animation-delay: 1.5s;
}
@keyframes animate {
    0% {
        opacity: 0;
        transform: translateX(20px);
    }
    100% {
        opacity: 1;
        transform: translateX(0);
    }
}

.nav__item:not(:last-child) {
    margin-bottom: 30px;
}
.nav__link {
    position: relative;
    color: #111;
    font-size: 2rem;
    font-weight: bold;
}
.nav__link::before {
    position: absolute;
    left: 50%;
    content: "";
    bottom: 0;
    width: 0;
    height: 2px;
    background: #000;
    transition: all .3s ease-out;
}
.nav__link:hover::before {
    left: 0;
    width: 100%;
}
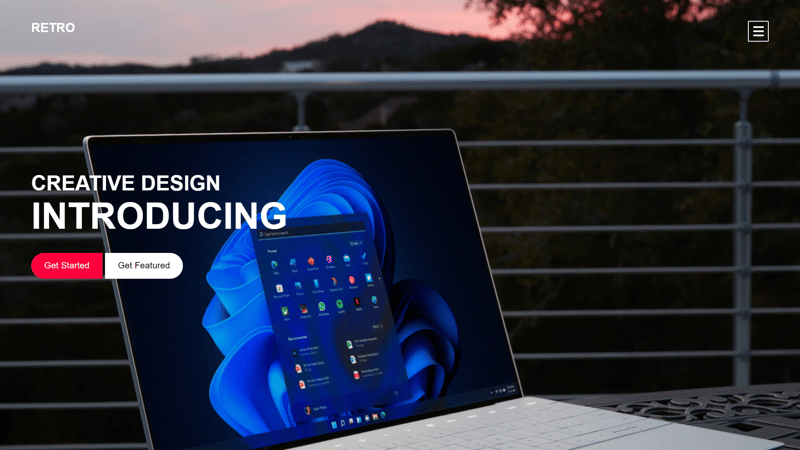
4. After saving, you should see something like this
5. Now let's make the app interactive
To do that add the following code which brings the app to life.
function getPersonInfo(one, two, three) {
  console.log(one);
  console.log(two);
  console.log(three);
}

const person = "Lydia";
const age = 21;

getPersonInfo`${person} is ${age} years old`;
const DOMNodes = (() => {
  const hamburgerBtn = document.querySelector(".hamburger");
  const header = document.querySelector(".header");
  return {
    hamburgerBtn,
    header,
  };
})();

let isMenuOpen = false;

const toggleMenu = () => {
  if (isMenuOpen) {
    DOMNodes.header.classList.remove("is-menu-open");
    isMenuOpen = !isMenuOpen;
  } else {
    DOMNodes.header.classList.add("is-menu-open");
    isMenuOpen = !isMenuOpen;
  }
};
const resizeMenu = () => {
  const windowWidth = window.innerWidth;
  console.log(windowWidth <= 850);
  if (windowWidth <= 850) {
    DOMNodes.header.classList.add("is-mobile-screen");
  } else {
    DOMNodes.header.classList.remove("is-mobile-screen");
  }
};

DOMNodes.hamburgerBtn.addEventListener("click", toggleMenu);
window.addEventListener("resize", resizeMenu);
Conclusion
So in this post, we've learned to build the most amazing and unique navigation bar that exist to this day on the internet. I'm very happy if you've enjoyed it. So good luck with your programming :)


