
[Note: Trust me this blog has new things you have never even heard of)
Does your editor also looks like above? Bored up of your regular VS Code themes? Using those same fonts since starting? Want to level up your VS Code environment to make it look THE BEST ??
Save this post cause today I am gonna show you exactly that!
I will be showing you how to transform your regular old boring vscode to a completely new looking editor!
Step 1: Pre Requisites
The first and foremost thing you need is VS Code 😂. Okay I know that you had that :) Anyways we are going to download some things.
Step 2: Nerd Fonts and Inter Font
Nerd fonts are fonts which support ligatures and have hundreds of different glyph icons which are not present in your OS fonts.
Go to this website and download some monospaced nerd fonts. For the sake of this tutorial, I am gonna advise you to download Fira Code, Jetbrains Mono, Victor Mono for this tutorial. Also install the above downloaded fonts.
Download and install the nerd fonts on your respective OS.
Now go to your VS Code. Open settings by pressing Ctrl/Cmd + ,.
In the Editor: Font Family section, change font name to JetbrainsMono Nerd Font. See below image for reference.

So now our editor looks a little bit nice, ain't it?
Now you also need to download and install 'Inter' font.
Go here: https://rsms.me/inter/
And download it, install it. We will use it later.

Step3: Install Themes
Now we are gonna be installing some themes. Go to VS Code and search for this theme: Best Themes Redefined

Hit that install button and BOOM 💥 .
SO MANY DIFFERENT THEMES !! ALL UNDER ONE! SELECT THE ONE WHICH SUITS BEST TO YOU.
Step 4: (ONLY FOR WINDOWS, NOT NEEDED ON MACOS) Install Mactype
Mactype is an application used to improve font rendering on Windows. Install Mactype from here: https://github.com/snowie2000/mactype/releases/download/v1.2023.5.31/mactype-20230531.zip
And install it. Now open Mactray, select run as windows service. Click Next. On next screen, select default profile. Click finish. You are good to go!
Step 5: Customizing VS Code UI
Dowload Custom CSS and JS Loader.

Now you need to create a css file at a location of your choice in your os. Since I am using Windows here for this tutorial, I am creating it at C:/Users/Username/.local/customcss.css. Now remember this location.
Open VS Code, press Ctrl/Cmd+Shift+P, type open user settings json.
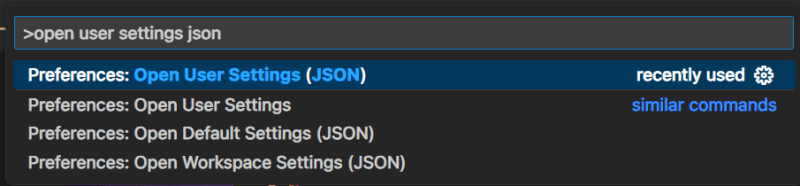
Add following line to it:
"vscode_custom_css.imports": [

 "file:///C:/Users/username/.local/customcssforvscode.css"
],

Path name will differ for different OS and users.
Now open the css file you created and add following lines to it. .windows class is only for windows. Use .linux OR .mac for your OS respectively.
.windows {
    font-family: "Inter";
    -webkit-text-stroke-width: 0.2px; /* not needed on macos */
}

.mtki {
    font-family: VictorMono Nerd Font;
}
What does it do?
Giving stroke width improves font display on Windows and Linux. We are also changing font family of the UI to Inter.
Modifying properties in mtki class control the italic font behaviours in VS Code. We changed italic font family to our desired font.
You can modify these as much as you want.
And save it.
Now press Ctrl/Cmd+Shift+P, type enable custom css and js, and press enter. Restart VS Code as instructed
Voila!! A complete different and new looking VS Code.
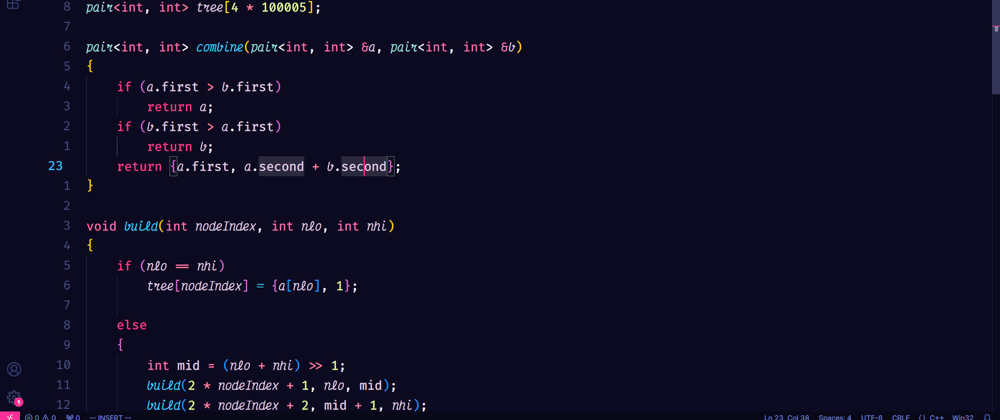
You will notice all italic fonts are now looking very very good.

This is how it will look after doing above customisations.
Step 6: Customising Title Bar
Press Ctrl/Cmd + ,, type window.title. You will get a input box like below.

Now type whatever you think is right for you. I just type file name and my name. You can do as you like.
Also change title bar style to custom.

///////////////////////////////////
Everything is complete. Now you have a completely new looking VS Code.
///////////////////////////////////
More customisations include messing with settings in View Menu. You can enable different modes such as zen mode etc to get a more focused editor environment.
///////////////////////////////////
Hope you liked my blog. LIKE AND SHARE IT!


