Table Of Contents
- Introduction
- About this Blog
- Notes for the Reader
- The Real Juicy Stuff
- What Even Is Git/GitHub?
- What Is Version Control and Why Should I Care?
- How Do I Get Started?
- Setting up Git/GitHub
- What Is A Repo?
- Common Git Terms
- How Do I Add my Files to my Repo?
- What Next?
- Accessing Other Peoples Repos?
- How do I Add Changes I Made to Another Persons Repo?
- How do I Create a Pull Request?
- Conclusion
Introduction
Breaking into the tech industry as someone over the age of 25, who didn't study computer science in school was intimidating.
I’m 29 years old, the extent of my ‘tech’ education in school was building a website using PowerPoint – yes – you read that right – PowerPoint.
I bumbled my way through life, knowing tech was something that I was interested in but that I always thought was out of my reach.
If you are reading this and you are feeling like I was, I am here to tell you…
Tech is for you! And I am on a mission to help you make the best start.
About this Blog
Welcome to my blog – a series of articles for newbies aimed at explaining things that I found challenging in very plain English so that they will be a breeze for you (hopefully).
As a newbie I often found the guides I am reading have this element of tech "stuff" I am just expected to know about. They all seem to assume prior knowledge or knowledge around the subject so I created this blog to help guide you through the things I found tough.
I am open to feedback so please, leave me some below or reach out to me on Twitter. I am also keen to cover the topics that you will find most useful so if you have got a burning question/worry get in touch and I will try and include it in this series.
This is article 1. I ran a poll to get an idea of which topic to cover first, the vote came out as:
- Git/GitHub
- Hosting/Domains
- What even is Web Dev? (this will be an overview of the industry, roles, languages, working options etc.)
Just so you know what will be coming up next 😊
A couple of notes for the reader
UPDATED 12/08/2020
Git & GitHub are slowly updating their terminology from master branch to main branch so this article has been updated to main throughout except in the instructions where you will still need to use master.
Navigation - you can read this guide all in one of use the contents list above to jump to the sections you need.
This is a complete beginners guide to Git/GitHub: setup, creating your first repo and pull requests (don’t worry newbies, stick with me, we will go over this), it is not an extensive manual so if you’re looking for more extensive material on Git/GitHub can I suggest you check their documentation here: https://guides.github.com/.
This guide assumes you have an interest in Web Development and have started learning to write code in some form.
I have tried to explain everything very simply, if you feel patronised, I’m sorry but as someone who found other guides too technical, I wanted to try a no jargon approach.
My instructions are for setup in Windows – if you are a Mac/Linux user and the setup differs greatly, please can you share the instructions with me so I can add them here. Thanks 😊
Ok if you are still with me, lets dive in.
The Real Juicy Stuff…
Learning Outcomes
By the end of this post, I hope you will be able to:
• Understand what Git/GitHub is
• Understand why you might want to use it
• Know how to set up Git/GitHub
• Understand what a repo is
• Know how to create your first repo
• Know how to clone someone else’s code and create a pull request
What even is Git & GitHub?
Git and GitHub are not the same thing, but they are partners in crime.
Git is a version-control system that is downloaded to your computer, it monitors code files that you/others have written and keeps track of any changes you or other developers make to those files. It’s particularly helpful if you are working on a project with multiple people, it allows each developer to have a copy of the code file and the history of that file on their own PC/laptop so they can make changes on their own version before merging it with the main copy.
GitHub is a public storage space for those files and allows easy access to the code files for anyone who wants to see them/work with them. It also allows you to access other peoples code if you want/need to.
But, "what is version control?" I hear you cry...
As you progress with your learning of programming languages and your confidence with projects grows, you might choose to move away from online code editors like CodePen where you essentially type all the code that would normally appear inside the "body" tags and switch to a software-based development environment like Visual Studio Code.
Software-based Development Environments – often known as Code Editors or IDE's (Integrated Development Environments) are software that you can download to your computer, these work like offline coding ‘pens’ where you can write and debug code on your own laptop/PC. You can also download extensions that make writing code easier. I will cover Code Editors/IDE's and file setup in a later post so keep your eye out.
Generally, to get started with a project in you need to create ‘files’ such as:
style.css
index.html
script.js
These are the files that contain your (source) code.
Now, fast forward 12 months, imagine you are building the new hottest app (I have great faith in your abilities 😉). You have published version 1.0 to the app store and sales are going well, but, to fix bugs and stay competitive you want to update the original code.
While updating the code, you hit a skills gap, however, you are aware your buddy, knows something about the issue you are facing so you send the file to her. She takes a look, adds some code and sends the file back to you. You accidentally overwrite the existing file and the app stops working.
How do you get back to the original?
How do you know which change it was that caused the error?
That is where version control and Git come in. Git keeps the original source code at the heart of your project and tracks all changes made to that code by you and your pal, so should you need it; you can roll back to earlier versions. It also allows multiple people to work on a file at the same time and merge the separate changes without causing issues to bring together one updated file – i.e. version 2.0 of your app (and so on).
I'm not building an app, why do I need it?
Git/GitHub are very widely used in the industry, here's a list of the benefits:
- If you are considering transitioning to a career in Web Development, it is a good place to showcase your code to potential employers
- It shows these same employers that you are confident to have your code in a public space
- You can host/publish your portfolio on GitHub
- It shows you have an understanding/appreciation of version control
- It shows you can use industry specific tech
- It puts your work out there so other devs can see it, improve on it and potentially coach you on how to make it better
- If you want to contribute to Open-Source projects (I will cover these at some point too) you can access them on GitHub
- It allows you to track changes you make to your side projects and therefore, track your progress
Ok, so far so good, how do I get started?
First things first, you will need to download Git. You can do that here:
Windows: https://git-scm.com/download/win
Mac: https://git-scm.com/download/mac
Linux: https://git-scm.com/download/linux
I (Laura) have Windows so my instructions are for installation/set up with Windows – as I said up top, if you’re a Mac or Linux user and the setup is very different please let me know so I can include it.
Now, I am not a tech expect or even remotely expert with Git/GitHub, so I opted for all the standard options during the installation process. Unless you know differently, I would suggest you do the same (just click next a bunch of times until it finally says finish).
Next you will need an account on GitHub, you can sign up here: https://github.com/
Please don’t get disheartened once you open GitHub, it looks terrifying, but I will take you step-by-step to set up, adding an existing project to GitHub, accessing/viewing other peoples projects and contributing to them.
Setting Up Git & GitHub
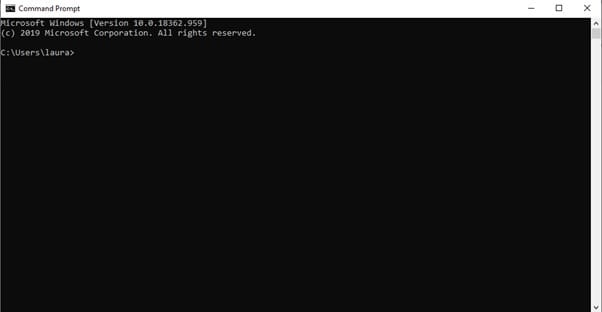
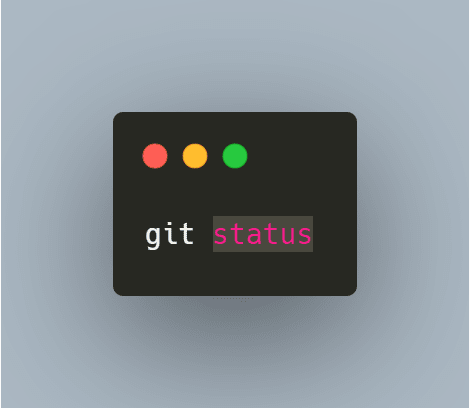
Git is controlled by the ‘Command Line’ on your computer, sometimes referred to as: cmd, cmd.exe or Command Prompt. If you don’t know, the command line is the black box with white text you sometimes see pop up when installing/uninstalling new apps, it looks like this:
If you are a Mac user you can go directly to your command line however, with Windows you will need to use GitBash.
When you downloaded Git, GitBash should have been included you can access it by pressing the Windows key and typing GitBash or by searching in the search bar.

Once open the screen will look something like this:

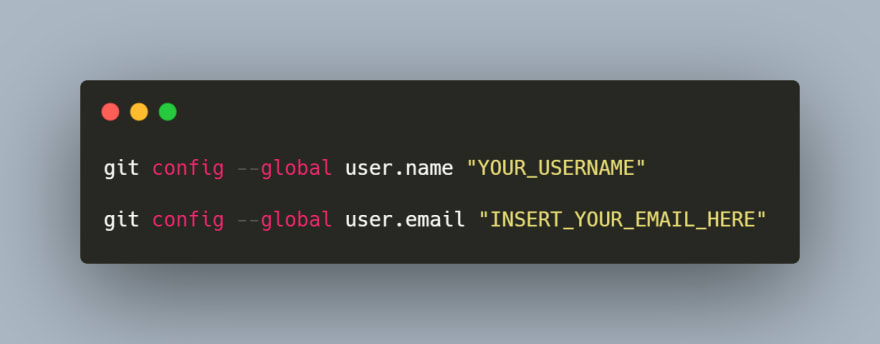
First you need to introduce yourself to Git, go on, make friends, you’re going on a long and fruitful journey together after all!
Give Git your Username & Email by typing the below after the $ on each line:
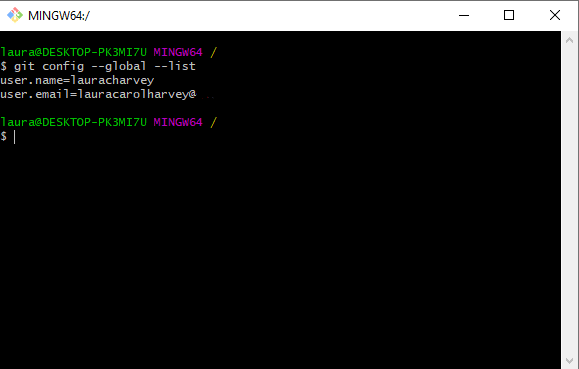
To check that these details have been saved, type:

Press enter and you should see something, a little like this:
Now Git is ready so you need to create a repo in GitHub – ready for it to receive your files.
But Laura - What on Earth is a Repo?!
A repo (more formally known as a Repository) is basically a container within Git/GitHub where your files will be stored. There are two types of repository: your local – the one on your computer and your remote – the one on the server - I like to think of it as the one in GitHub.
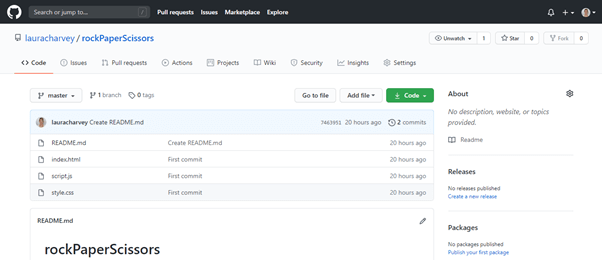
Inside a repo, you will find source code files, other files related to the project like sound bites, images and a README file which basically explains the project and should act as user guide (if necessary).
A repo looks like this:
You can create one easily by clicking on the ‘cat icon’ in the top left of GitHub to get back to the home page and then clicking the “New” button next to Repositories.
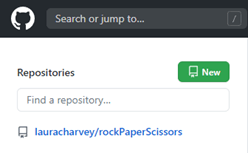

Give your repo a name, the description is optional, decide whether to make it public or private and then click “Create repository”. No need to create the README file at this stage, we will do that later. You can leave gitignore for the time being too.
Your new repo should look a little something like this:
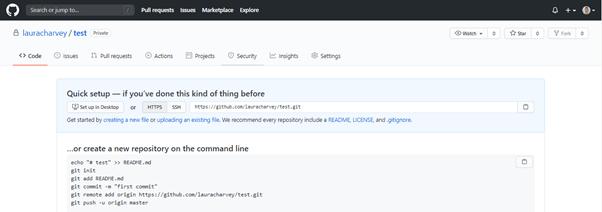
That’s it! Keep it open while we walk through linking your files.
So, how do I get my files into my Repo?
First, let’s talk a little bit more about how files are moved between your computer and GitHub.
We can refer to this as the “Git workflow”, there are four main elements:
Working Directory (the folders on your computer)
This is like a library of all your files, you need to access the correct folder (working directory) to control the files you want to change/upload
The Staging Area (the in-between)
This is where you can save files that you have been working on locally before you are ready to move them to your repository. It is like saying, I think these are the files I want to upload but I am not too sure, hold on to them for me and I will decide what to do with them later.
Staging is useful because it means you don’t have to send every single file in a folder to your repo, it allows you to just move the files that you want to upload
Local Repository (on your computer)
Your repository (folder/box/container of files) on your PC where your files are stored and only you have access to
Remote Repository (GitHub)
Your repository that is held on the server (online/remotely/not where you are) and can be accessed by anyone – in other words your GitHub repository.
Common Git Commands
There are various commands (all typed into GitBash) to tell Git what to do with your files here are the ones you need to be aware of at this stage:
cd Desktop/FolderName – this tells the command line which folder (directory) on your computer you would like to send into the git workflow – we will work through an example of this later
git init – think of this as initializing or starting off the process. If you want to do anything with git you need to include git init. It turns the folder from a normal folder to a Git folder – one that Git has access to
git add – this moves your files into the staging area
git commit – this moves your files from the staging area into your local repository (the one on your computer)
git push – this copies your files from the local repository (the one on your computer) and sends them to the remote repository (the one of GitHub)
git pull – gets files from the remote repository (the one of GitHub) and puts them into the working directory (your library of Git files).
git status – tells you the status of your files - where they are sitting and what you have done to them
git clone – allows you to copy other peoples files from GitHub to your local repository (your computer)
Ok, so can I put my files in my repo yet, or...?!
Yes! Here goes, a step-by-step guide, how to add an existing project of your own to GitHub.
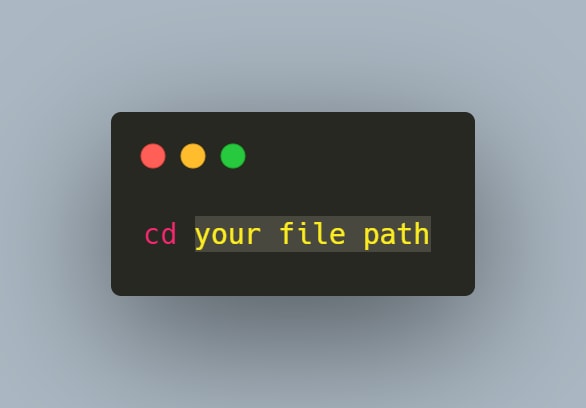
1. Tell Git where to look
Open GitBash and type:

So, if your project was stored on your desktop under a folder called “project” you would type: cd C:\Users\yourname\OneDrive\Desktop\Project
2. Create your README file
Type:

You can edit this README file in GitHub later
3. Start the process
Type:

GitBash should then think about it for a second and give you an initialization message and label this folder the “main”.
4. Add files to your Staging Area
Type:

Don’t forgot the space followed by a full stop after add, this means “all” and will ensure all files in the selected folder will be marked for action in the staging area
If you only want to add certain files you can do so by:
git add followed by a space and then the filename
5. Check the status of your files
Before moving forward, you might want to check which files are in the staging area. You can do this by checking the ‘status’. Type:
It will list all the files in the staging area
6. The Scary One
Type:

Sends all your files to your local repositories. The -m “” is simply included for you to be able to add a message with your commit i.e. “first commit” or “commit with bugs fixed”
7. Set up the link between your local and remote repository
In GitHub, open the repository you created
At the top of the Quick setup section, you should see a URL

Copy this to your clipboard (CTRL & C)
Now back in GitBash type:
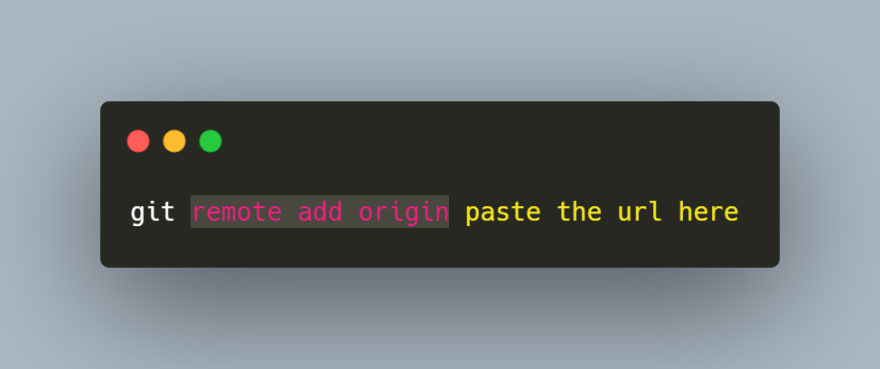
You will probably have to use right mouse click + paste as CTRL & V doesn’t seem to work with GitBash.
8. The Really Scary One
Type:

This copies or ‘pushes’ the files from your local repository (your computer) to your remote repository (GitHub) i.e. makes them visible and available on GitHub you need the “origin main” to tell which branch in GitHub to update (more on this below).
9. Do a Victory Dance!
You just pushed your first repo to GitHub – you’re now a fully-fledged Web Developer 😉
YES! I DID IT! BUT WHAT DO I DO NOW?!
You can make changes to the code files on your computer, save them as you normally would and then in GitBash:
- git add . (add your updated files to the staging area)
- git status (double check the status of your files)
- git commit -m “second commit – bugs fixed”(commit to local repo)
- git push -u origin master
Code and repeat…that’s all there is to it!
Got it, but how do I access other peoples code?
Find a project you want to contribute to or look at on GitHub. You can test using my rock, paper, scissors game if you would like to.
Link here: https://github.com/lauracharvey/rockpaperscissors
• Open the repository for the project you are interested in
• Fork It

In the top right, under you profile picture there is a Fork button, this creates a copy of the remote repo on your own GitHub.
• Click “Code” in the top right-hand corner of the main body

• In the dropdown, select the repo URL, copy it to your clipboard
• Now go to GitBash and type:
Where your file path is replaced with wherever on your computer you want to store the new files.
• Then…
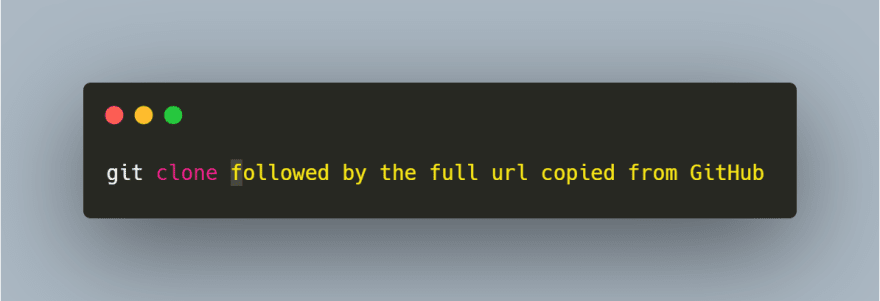
example: git clone https://github.com/lauracharvey/rockPaperScissors
• Finally...Code 😊
You can make changes to your local copy of these files however; you cannot upload them to the other persons remote repo yet.
In order to do that, you first need to create a branch of the code and then create what is known as a “pull request”.
How do I make changes to another persons repo?
TAKE A DEEP BREATH
So…Git/GitHub are set up in a branch system, imagine a tree with 5 branches, and 2 woodpeckers who live on that tree, woodpecker A pecks on branch 1 while woodpecker B pecks on branch 2. Both branches belong to the same tree (the main tree) but they can both work at the same time on these different branches, woodpecker A does not have to stop to allow woodpecker B to do their work.
Lets, bring that back into the context of Web Development – Developer A & B are both working on the same project – for arguments sake, let’s say a rock, paper, scissors game.
Developer A finds some bugs and wants to fix those bugs so starts working on them on his computer.
Developer B wants to work on some new features of the game but he’s in a hurry and doesn’t want to wait for A to fix his bugs.
With Git/GitHub Developers A & B can have their own version (branch) of the project on their own computer so they can both work at the same time, once they have finished their coding, they can commit/push those changes to their branch without impacting the main file (the tree).
Once they have agreed on the changes, they can then agree to update the main file that is stored in GitHub.
The first steps in creating a pull request are:
1. Check you are in the correct repository

So, if your project was stored on your desktop under a folder called “Making-Code-Better” you would type:
cd C:\Users\yourname\OneDrive\Desktop\Making-Code-Better
2. Create your branch
Type:

Make sure you give your branch a descriptive name, so it means something to everyone working on the project i.e. branch-to-fix-bugs-in-version-1
3. Make sure you tell Git to open the new branch by using checkout
Type:

You should then get the following message:
Switched to branch ‘branch name’
You can use git checkout at any time to move between branches, you use the command git checkout main to move back to the main file.
4. Add updated files to your local repo (still on the branch).
Type:

5. Add these changes to your forked repo in GitHub
Type:
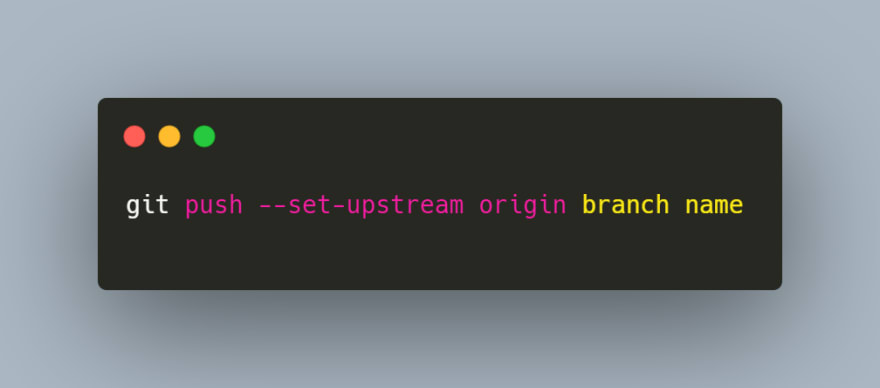
This is just like a normal push but you are making sure you push to the branch instead of the main file
6. Go to GitHub and get ready to make a “pull request”
Making the actual Pull Request
If you've jumped ahead to this section, you need to read the above steps to set up a branch from the original repo before creating a pull request.
If not, here are the steps for creating one:
- In GitHub – open the forked repository (your copy)
- Click “New Pull Request” on the left-hand side
- Select the original repository on the left and your forked repo on the right
- You should see an alert notifying you that the branches can be merged – this means there is no conflicting code
- The original creator will be notified and can decide whether to accept your pull request AND you’re done – you’re up to speed with Git/GitHub…3000 words and possibly a very tired brain later. Well done!
Conclusion
I really hope this guide helped you understand the steps needed to main your first experience with Git/GitHub without being bowled over by jargon.
If you have any questions or there is something I have not explained clearly, please drop me a comment.
As explained in the intro, I would like to do a series of these guides so comment or reach out to me on Twitter if there is anything, you would like me to cover.
I have loved putting this guide together so please, give me more things to write about! 😊