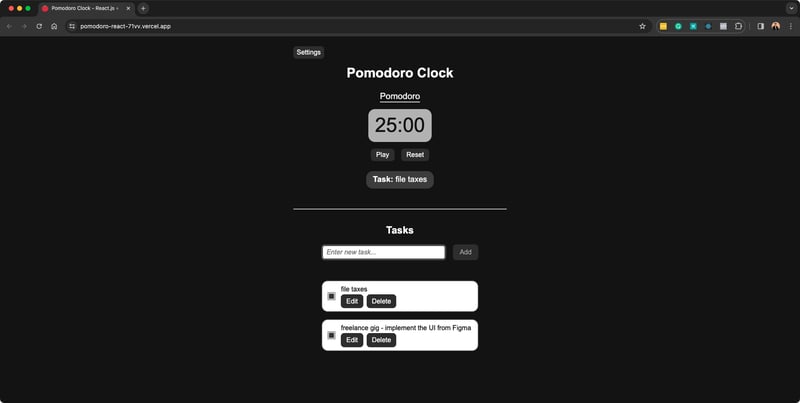
TL;DR: I'm learning state management in React and I built this Pomodoro Clock. No state management libraries used (i.e. Redux), just Context Managers, useRef, and useState. Also, this blog is more of a personal journal rather than a technical guide or a tutorial.
Journal
I'm using React.js for quite some time now, but lately I decided to step back and relearn the fundamental concepts.
State Management is at the core of React.js which I barely focused on when I first started learning React. This gave me headaches down the road after I encountered deeply nested components with complex state logic.
This is a common mistake committed by beginners (like me), which is not paying attention to the fundamentals.
Not knowing proper state management gave me problems like prop drilling and handling unnecessary states, while my code is messy, hard to read, and ill-structured. As a result, the app itself is buggy, inefficient, and have tons of unnecessary re-renders. Yikes!
So with this problem, I decided to learn proper state management in React.
My main resource for this is this section of the React docs about state management. After reading it, I decided to put my learnings to the test and try to build a project with complex state logic.
For this, I decided to build a Pomodoro clock.
The Project
NOTE: If you look at my code, you may still see some issues regarding proper state management and structuring my code, but this is an improvement as compared to my last projects with improper state management. I'll be kind to myself and take it as a good first step😉
Learnings
I learned a lot from what I read in the React docs as well as on that project, but I'll try to summarize some of my learnings.
Thinking in React
This section in the React docs about thinking in React resonates on me.
I learned that when building React projects, you should start with a mockup and plan your project from there.
By braking it down:
- Have some kind of UI Wireframe or mockup of the UI. This will become the basis of the rest of the plan.
- Break the UI into a component hierarchy. Identify which parts of the UI makes sense to be grouped together and define the components that will make up your UI based on your mockup.
- Build a static version. Start defining the markup first. State and props can be added later. You can use static data for the state and props so that you can check how your components reacts to these inputs.
- Find the minimal but complete representation of the UI State. Identify all the data your components will rely on. Then from these data, identify which ones are dynamic (changing) and can't be calculated from other data/input. All of the data that fits this criteria is considered a state. If several components rely on a similar data, it makes sense to not give them their own separate states but rather let these components share this data so that they're in sync.
- Identify where your state should live. Now that you identified the states in your project, it's time to identify which components should hold these states and how shared states will be handled. If sibling components would rely on a state and they won't be deeply nested, just pass these data as props. If the components relying on this state exceeded more than 1 or two prop passings, it just makes sense to pass the state via Context Managers.
- Identify how to manage inverse data flow. State trickles down the component tree, but for managing state changes made by child components, you need to pass down state setters as well, just like the state. Identifying where state setters should live and how to pass them is the same as how you identified where your states should live.


