Let your customers update payment info, change subscription plans, and download invoices within Bubble apps in this step guide.
by Ben Sears, Software Engineer @ Stripe
Overview
When accepting payment information, many startups have to create interfaces to allow customers to change pricing tiers, update payment information, view past invoices, and cancel subscriptions. These are important features that are time-consuming to build on your own. The Stripe customer portal simplifies these requirements and presents your branded portal for end-users.
Bubble.io is a no-code platform for companies to build fully functional web applications. With a few steps, existing Bubble users can now integrate the Stripe customer portal to support subscriptions through the self-serve interface. This guide covers the steps to get up and running with Bubble and Stripe, no-code required.
Note: You will need to implement Webhooks if changes to a user’s subscription affect the Bubble app’s functionality. For example, cancelled/paused subscriptions should trigger a re-subscribe interface or pricing tier call to action.
Prerequisites:
- A Stripe account: https://dashboard.stripe.com/register
- Create a Stripe customer field in a Bubble database table (for example a
stripe_customer_idcolumn on the user table)

Steps
1. Configure the customer portal in test-mode at dashboard.stripe.com/test/settings/billing/portal
2. Create a test mode customer and save the customer_id
3. Install the API Connector plugin 
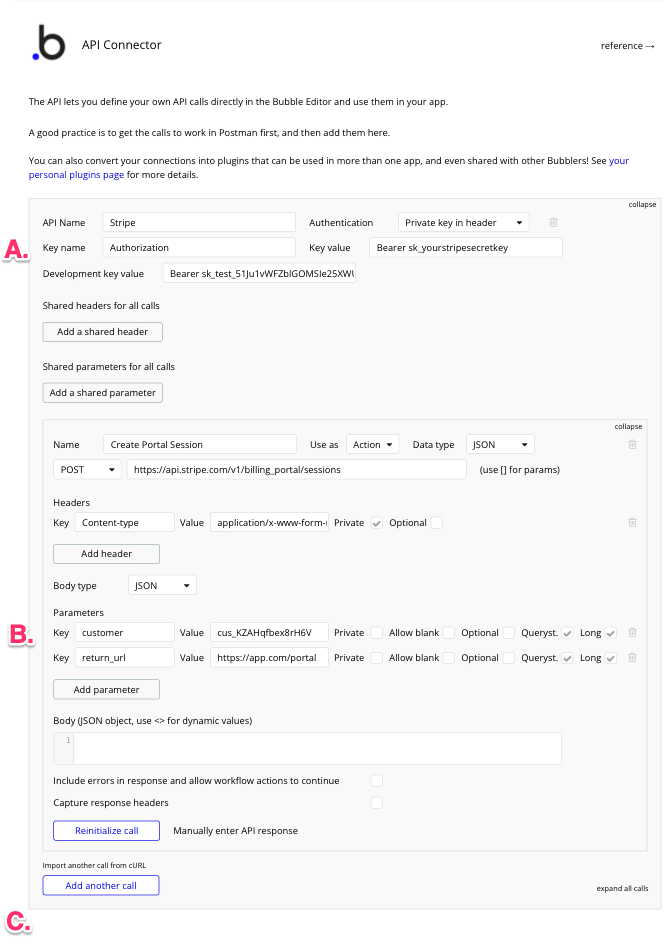
4. Configure the API calls used to create Stripe customer portal on the “Plugin” page
- a. The authorization piece should have both the Stripe live and test keys. Specifically, the key value should be live and the development key value should be test. In addition, make sure that each header value starts with “Bearer”. For Example: image or snippet here
- b. Enter a sample test mode customer_id as the value for customer (this will be needed for initializing the API call)
- c. The Return URL can be any test URL for now since you will set it dynamically in the workflow in a later step
5. Clicking on the button to initialize this API call will call Stripe and return back a response, click save on the response, this will be what is interacted with in the workflow 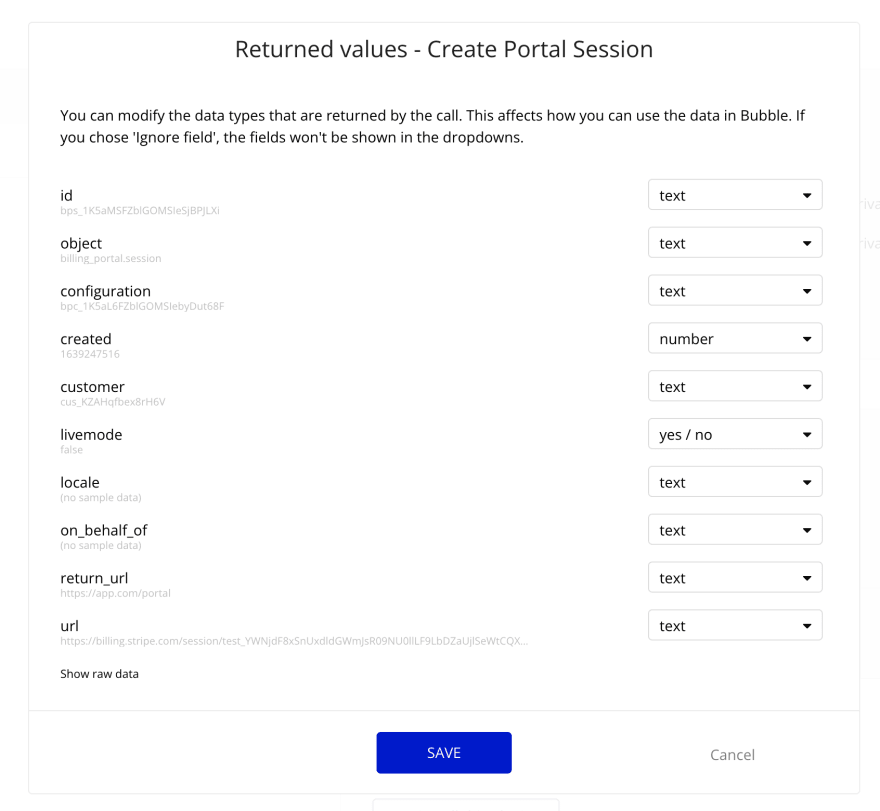
6. Create an element the user will click to be redirected to billing, for example a “Manage Billing” button that is going to send the user to the Stripe Customer Portal
7. Create a new workflow triggered on element click which uses the API defined in earlier steps, and then redirects the user to the URL in the payload
- a. Step 1 will call the API call defined, entering the current logged in user’s customer_id. Return_URL can be anything, in this example I use the current page, it will determine where the customer gets redirected to when they exit the portal.
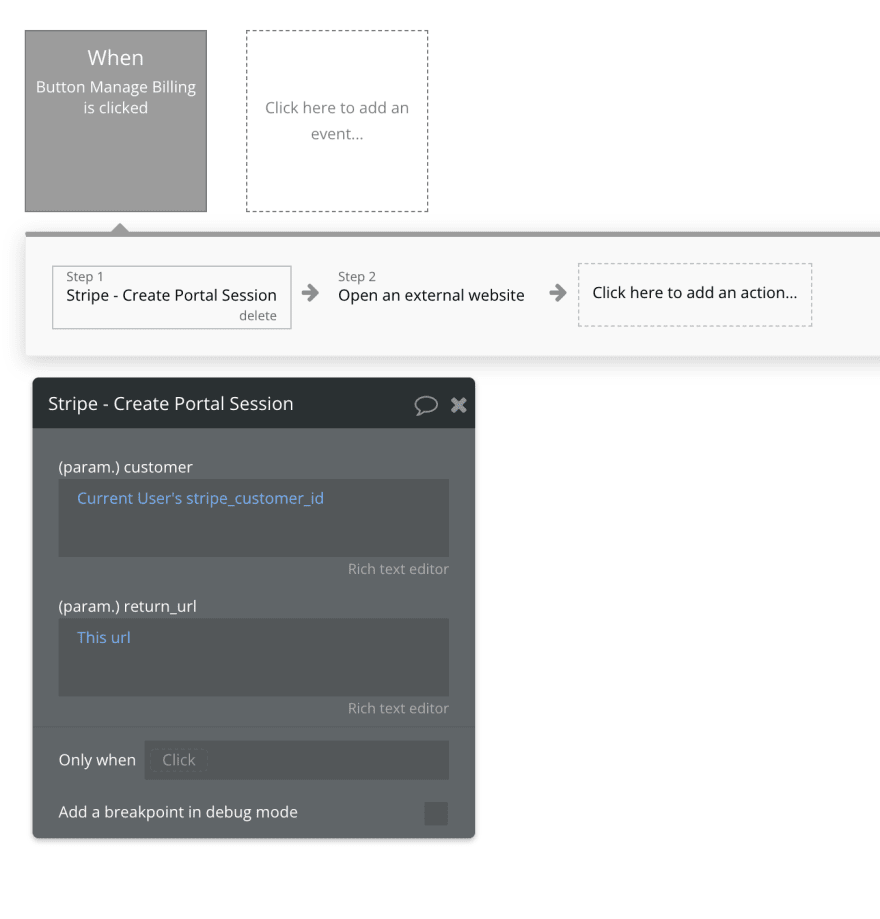
-
b. Step 2 will redirect the user to the
urlparameter of the create portal API call made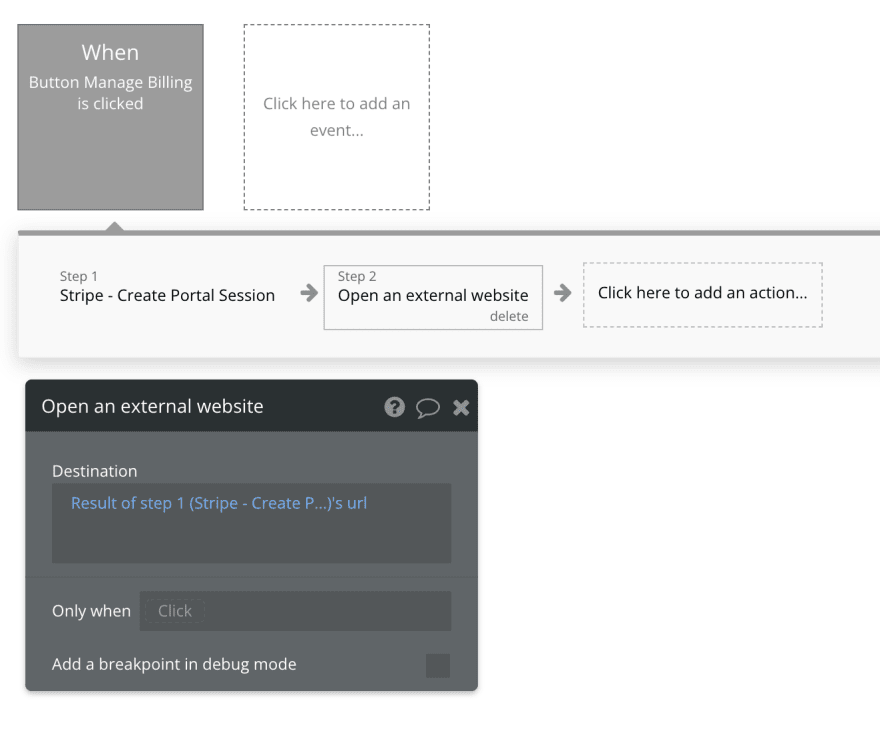
8. Testing the payment flow Watch on YouTube
Recap
We hope this guide helps you get your Bubble applications live with the Stripe customer portal. If you want to go deeper in understanding the self-service features available for your projects, check out our docs.
Let us know in the comments if you have any thoughts or questions!
Stay connected
In addition, you can stay up to date with Stripe in a few ways:
📣 Follow us on Twitter
💬 Join the official Discord server
📺 Subscribe to our Youtube channel
📧 Sign up for the Dev Digest
About the author
 Ben Sears is a software engineer at Stripe, focused on improving the developer experience for recurring payments (Stripe Billing). Prior to Stripe, Ben was the co-founder of Billflow, a no-code platform for SaaS pricing interfaces. Based in San Francisco, Ben enjoys building products, playing board games, and going for walks around the city with his chihuahua mix 🐾.
You can follow Ben on Twitter at @bsears_