
In the last part of this series it's finally time to use what we installed in the first two parts and use everything together!
If you have not been following along please go and have a look at the first parts in this series!
| Article | Link |
|---|---|
| setup react native & @storybook/react-native | Step 1: Setting up React Native with Storybook |
| setup react from scratch together with react native web | Step 2: Setting up react with react native web |
| setup @storybook/react + react native web to run as a parallel storybook | You are here now! |
Starting point
To just do a quick recap I want to state where we are at at this point in our journey.
- After Step 1, was completed we had a running React Native project with Storybook installed. It means when we run the code we have a storybook installation, which listens to the storybook development server for react native. Further we have react-native-storyloader set up. It loads our Storybook stories files for us when we run the dev command.
- After Step 2, we have in parallel a detached vanilla React project set up, with it's own webpack configuration, which is also using react native web.
So! what do we do now?! 🤷♂️
Manually installing Storybook for React.js 🤸♂️
For our repos web alter ego React.js installation we need to install Storybook, and since this was initiated as a React Native project we need to do that manually.
It's pretty straight forward and is described well in the storybook docs here: Storybook Docs: React.js Guide. Edit: WAS well described They changes the docs....
Let's go through the steps:
1.) at the root run the command in your terminal: 🚀
$ npx sb init --type react -f
-
--type reacttells the Storybook CLI to install stuff for a react project -
-fForces the installation, because the CLI will detect the react native installation and abort the installation without the face flag.
If everything completes properly you will see a newly created .storybook folder in the root of you project and a .stories folder added to your .src folder. Further it added a couple of scripts, and @storybook/react + react-is packages was installed + added to your devDependencies in your package.json.
2.) Add our scripts to package.json 🚀
It's a habit of mine to add scripts first, because it reminds me of what I'm trying to accomplish. All this work is because I want to run a script and something should happen right.
The Storybook CLI might overwrite some of the scripts already present in your package.json, I fiddled around a bit and landed on this final version for my scripts:
  "scripts": {
    "android": "yarn run prestorybook && react-native run-android",
    "ios": "yarn run prestorybook && react-native run-ios",
    "start": "react-native start",
    "test": "jest",
    "lint": "eslint .",
    "prestorybook": "rnstl",
    "storybook": "start-storybook -p 7007",
    "build-react": "webpack --mode production",
    "start-react": "webpack-dev-server --config ./webpack.config.js --mode development",
    "start-storybook-web": "./node_modules/@storybook/react/bin/index.js",
    "build-storybook-web": "./node_modules/@storybook/react/bin/build.js",
    "storybook-web": "yarn run start-storybook-web",
  },
The one we are focusing on right now are the start-storybook-web, build-storybook-web and storybook-web. The previous scripts we covered in the first two steps in the series.
3.) [Optional] Test our React.js Storybook installation before modifying it. 🚀
At this point we already have React Native component(s) inside of src/components and they cannot be rendered by Storybook as it is right now. To see that error in action you can right now run the script, by typing this command in your terminal:
$ yarn start-storybook-web
The error looks like this for me:
ERROR in ./node_modules/react-native-swipe-gestures/index.js 121:11
Module parse failed: Unexpected token (121:11)
You may need an appropriate loader to handle this file type, currently no loaders are configured to process this file. See https://webpack.js.org/concepts#loaders
However we can try our installation on the test components the Storybook CLI added for a React.js project inside of src/stories.
so open the file .storybook/main.js and change the stories array
From
module.exports = {
  "stories": [
    "../src/**/*.stories.mdx",
    "../src/**/*.stories.@(js|jsx|ts|tsx)"
  ],
...
}
To
module.exports = {
  "stories": [
    "../src/stories/**/*.stories.mdx",
    "../src/stories/**/*.stories.@(js|jsx|ts|tsx)"
  ],
...
}
and then run the script:
yarn start-storybook-web
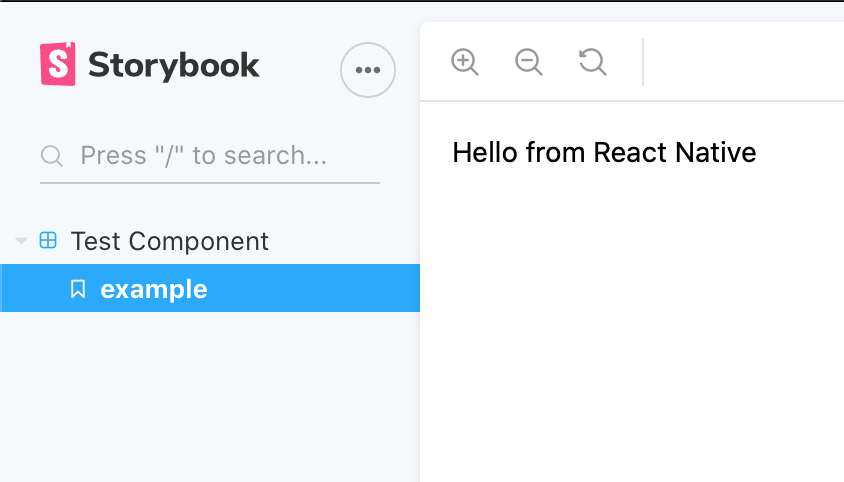
and it should compile! Behold! 🥳

4.) Adding our React Native Stories to Storybook 🚀
Close any instances and let's start adding our react native stories to our Storybook React.js setup.
Again let's modify .storybook/main.js to load our React Native written components and *.stories.js files.
From the above stories configuration
  "stories": [
    "../src/stories/**/*.stories.mdx",
    "../src/stories/**/*.stories.@(js|jsx|ts|tsx)"
  ],
To
stories: ['../src/components/**/*.stories.[tj]s'],
Note that I removed the .mdx files, I don't use that
Again, running the yarn start-storybook-web script will result in an error, because we have not configured the React.js Storybook installation to use React Native Web yet in a custom Webpack config.
so let's do that!
5.) Add a custom Webpack configuration to Storybook 🚀
Storybook already comes with a Webpack configuration which we don't really want to modify, but rather inject our own stuff into. And since we already what we want to configure, as described in Step 2 of the series, where we got React Native Web working with React.js, we have ALMOST all the stuff we want to inject into the Storybook webpack configuration already prepared. (We are missing one alias soon to be described)
So where do we inject our stuff?
open .storybook/main.js and at the top of the file import our webpack configuration like this:
const custom = require('../webpack.config.js');
and then in the module.exports = { ... } add an entry called webpackFinal like this:
const custom = require('../webpack.config')

module.exports = {
  stories: ['../src/components/**/*.stories.[tj]s'],
  webpackFinal: (config) => {
    return {
      ...config,
      resolve: { alias: { ...config.resolve.alias, ...custom.resolve.alias } },
      module: { ...config.module, rules: custom.module.rules },
    }
  },
}
In this way we don't overwrite, or destroy the Webpack configuration that Storybook already comes with, but rather we inject our own alias rules and our own module.rules into it.
Note: yes yes I removed the addons array
Also let's not forget that we need to modify our webpack.config.js because we want atleast more things in our aliases:
all @storybook/react-native imports should resolve to @storybook/react
because in the React Native side we are always using the import from @storybook/react native and obviously that's not what we want on the web side of Storybook. First the component go through React Native Web so there is no trace left of React Native Code in them after being compiled, and then we want to run Storybook as "normal" on them.
const path = require('path')
const HTMLWebpackPlugin = require('html-webpack-plugin')

const HTMLWebpackPluginConfig = new HTMLWebpackPlugin({
  template: path.resolve(__dirname, './public/index.html'),
  filename: 'index.html',
  inject: 'body',
})

module.exports = {
  entry: path.join(__dirname, 'index.web.js'),
  output: {
    filename: 'bundle.js',
    path: path.join(__dirname, '/build'),
  },
  resolve: {
    alias: {
      'react-native$': 'react-native-web',
      '@storybook/react-native': '@storybook/react', //<-here
    },
  },
  module: {
    rules: [
      {
        test: /\.js$/,
        exclude: /node_modules\/(?!()\/).*/,
        use: {
          loader: 'babel-loader',
          options: {
            presets: ['@babel/preset-env', '@babel/preset-react'],
          },
        },
      },
    ],
  },
  plugins: [HTMLWebpackPluginConfig],
  devServer: {
    historyApiFallback: true,
    contentBase: './',
    hot: true,
  },
}
and if that is super confusing to you please read Step 2, where I try my best to explain the webpack part 😅
Let's try our yarn start-storybook-web script again and see if it runs!
yarn start-storybook-web
🚀🚀🚀🚀🚀🚀 BEHOOOLD! 🚀🚀🚀🚀🚀
Adding Styled components to webpack
Just for the ones of us that want's to use styled components when we create our react native components, add this line to your aliases in the webpack config and it should hook right in 👨💻
'styled-components/native': 'styled-components',
so aliases look like this:
    alias: {
      'react-native$': 'react-native-web',
      '@storybook/react-native': '@storybook/react',
      'styled-components/native': 'styled-components',
    },
Fin!
Hope this was educational and a little cool!
Now you can host a static website with your React Native components, or you can actually develop them in a browser without firing up a simulator / emulator. Which is really niiiiiiice, especially if you are running on an older machine!
See the full repo here! --> Github: react-native-storybook-boilerplate
I got it hosted on Netlify, and again, the components are all written in React Native syntax!
The other parts again!
| Step | Link |
|---|---|
| Series: The ultimate react native ui library starter repo | Step 0 link |
| Step 1: Setting up react native with Storybook | Step 1 link |
| Step 2: Setting up react with react native web | Step 2 link |


