Automatically creating a screenshot of a webpage used to be hard. Using puppeteer it became quite simple. Puppeteer is a headless Chrome Node.js API. So you can programmatically do everything you can do everything with it programmatically, that you manually can do with the Chrome browser.
So let's create a screenshot of my blog over at codesnacks.
First, we'll have to install puppeteer of course. Run
npm i puppeteer
to install puppeteer.
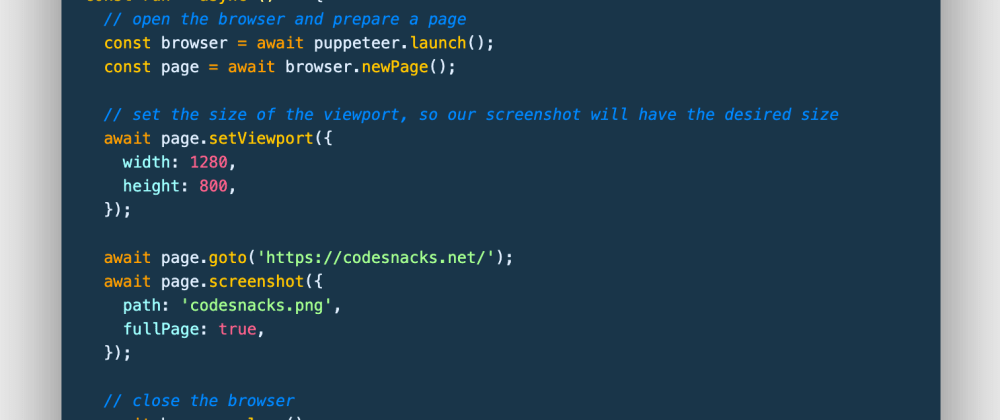
const puppeteer = require("puppeteer");

// we're using async/await - so we need an async function, that we can run
const run = async () => {
  // open the browser and prepare a page
  const browser = await puppeteer.launch()
  const page = await browser.newPage()

  // set the size of the viewport, so our screenshot will have the desired size
  await page.setViewport({
      width: 1280,
      height: 800
  })

  await page.goto('https://codesnacks.net/')
  await page.screenshot({
      path: 'codesnacks.png',
      fullPage: true
  })

  // close the browser
  await browser.close();
};

// run the async function
run();
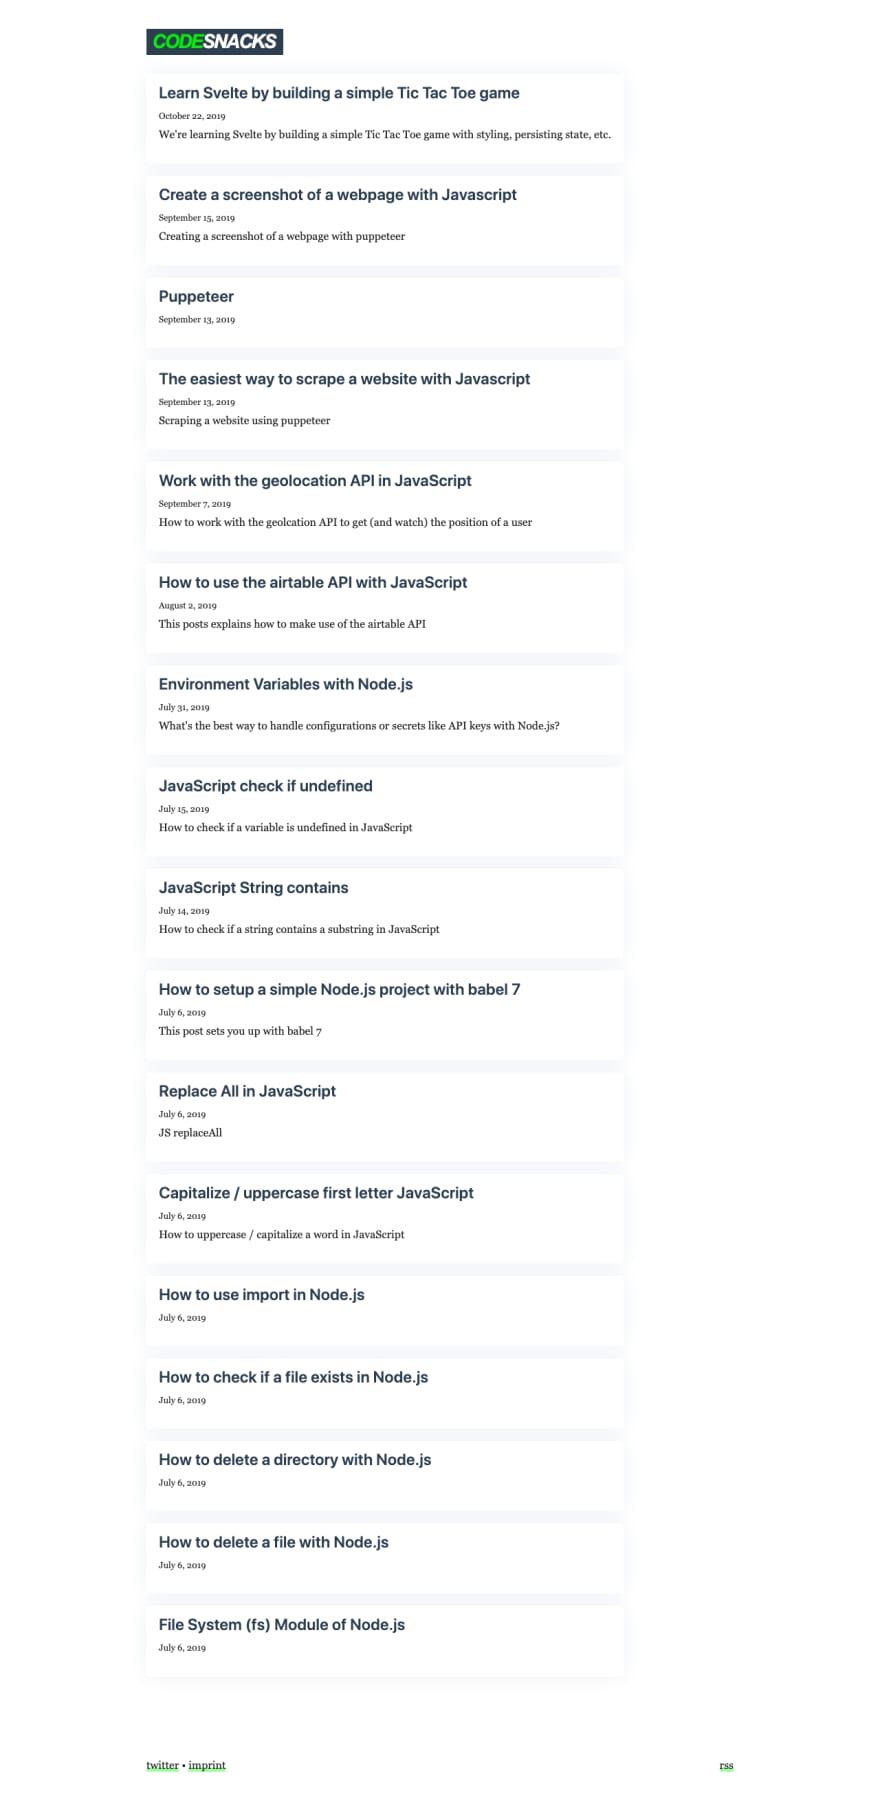
That snippet will create a screenshot of the whole page, that's 1280 pixel wide. Of course, you can also set other sizes. The screenshot will be saved in the same directory your script lives in. You can change the directory and name of the file in the path.
That's a super simple way to create screenshots. Please consider following me, if you're interested in what else you can do with puppeteer and if you don't want to miss any of my upcoming articles in this series.


