I got the chance to do a bit of travelling this year, and managed to meet a lot of developers from different parts of the world. One thing that comes up in our conversations is how our local tech communities are like. I absolutely love answering this question.
Singapore, in my opinion, has one of the best tech communities in the world. Sure it’s a pretty small country, but that’s a large factor as to why we are such a tight-knit community. We have a number of strong community leaders that have built up a solid foundation of support for veterans and newbies alike.
Want to start your own meet-up? We have a tonne of resources available at We Build!, which is THE go-to platform to find out all about the tech scene in Singapore, what events are on, how to start your own meetup etc. Almost all meetup talks are recorded by Engineers.SG. In their words, they are a not-for-profit community initiative created to help document the Singapore tech and startup scene.
Long story short, my friends held a hackathon that was inspired by Stupid Shit No One Needs & Terrible Ideas Hackathon and decided to hold our own Super Silly Hackathon. It was great. I had the best time 🙆. Also, their website is awesome. It has a diagonal scroll. Lim Chee Aun designed and built it. Check out his talk. Plus, cats.
Team 486
There had always been a computer in my house, from way before I was born. According to my siblings, we even had an Apple II at some point. It either died before I was born, or we left it when we moved down south. or something, but it’s gone now 😩. What I do remember is the 386, or maybe it was a 486, on which I learned enough about DOS to run games.

I talked a lot about that when I reminisced about the 90s last year. That was when I got to know a fellow retrotech enthusiast, Yeo Kheng Meng. He is the most awesome guy, because he managed to get Windows 3.11 working on modern hardware, and presented it at Hackware, Singapore’s monthly hardware hacks meetup. That’s not the only thing he’s awesome for, just one of many.
Anyway, I had been planning to show up at this hackathon and just muck around but then Kheng Meng asked if I was interested in trying to run a modern Linux system on an old 486. Of course the answer was a resounding YES. He’d bought the old machine online, somewhere, and after some quick discussion, we decided to go ahead with the plan.
The name of the team came much later, when we were told we had to have a name. Naming things is hard. So we went with the obvious. Team 486.
Pre-hackathon prep
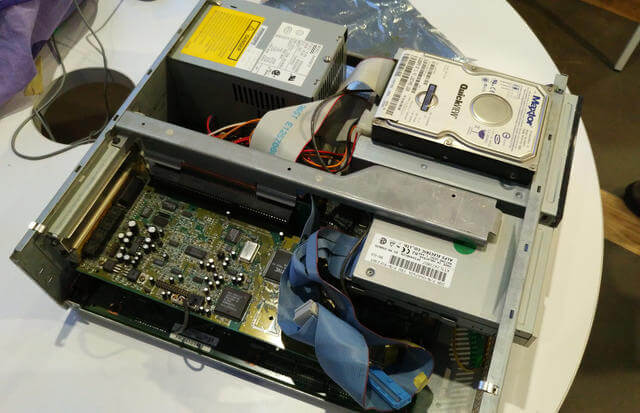
Kheng Meng had way more hardware than I did, and did a bit of experimentation before the hackathon. We were working with a IBM PS/1 Consultant 2133 19C with the following hardware specifications:
- AMD 5X86 running at 133mhz
- 64MB RAM
- IBM CD ROM Drive
- 3.5” 1.44mb floppy drive
- 171 mb Hard Drive
- Sound Blaster 16 card
- VGA Graphics
- 10Mbps 3Com Etherlink III 3c509B
Update: Kheng Meng adds that the Am5x86 is AMD’s high performance clone of the Intel 80486. Because most people associate 486 chips with Intel but no, my friends, I did not make a typo when I said the chip was an AMD. Also, the machine does not have a PCI bus at all. The network card uses the ISA slot.
It’s quite a high-end machine for its time but we were trying to run relatively modern software on it, so the hunt for smallest Linux distros began. Kheng Meng did some research and found people with success on the 486 using Gentoo Linux. We also considered Slackware. But turns out our machine couldn’t handle either of those.
I remembered installing Damn Small Linux on an old Pentium 2 a number of years ago, but it hadn’t been updated in a while. So we looked at Tiny Core Linux instead. Kheng Meng had prepped a number of boot discs beforehand, but also brought along his trusty Thinkpad T430, which could multi-boot into Linux Mint, Windows 10, Windows XP and FreeDos (just because).
We had the means to burn CD images as well as floppy disc images, so don’t throw away working old hardware, folks. You never know when they might come in handy.
And so it begins…
That hard disc is really tiny, so Kheng Meng replaced it with his 80gb Maxtor HDD instead, which we just rested on top of the machine. I managed to procure a 19-inch VGA monitor, and brought along a mini wifi router because we’d have to fiddle around to get our machine hooked up to the internet somehow. Kheng Meng brought tonnes more gear, so he had a nice suitcase.
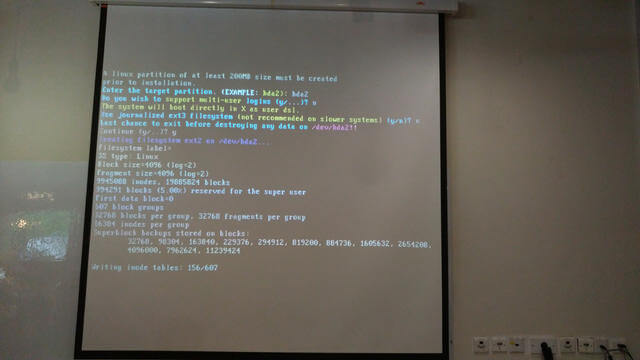
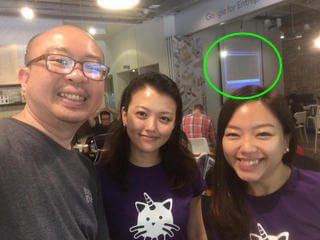
First problem of the day, like 15 minutes in. The monitor couldn’t read our 486’s output. Zilch. But we snagged a great spot, right next to the location’s projector inputs, so we hijacked the projectors for the entire day. Basically, the venue had a setup for 3 projector screens around the room, and everyone could see whatever we were doing for the day, even if they didn’t understand what it was we were doing. Best feng shui of the day, me thinks.
After we finally got the display to output, the next step was to boot and install Linux. Our choice of OS was Tiny Core Linux, and we had 2 versions burned to disc, Tiny Core and Micro Core. We started off with Tiny Core, but it wouldn’t take. The machine rebooted every time it tried to boot the kernel.
So we tried the Micro Core version next, but since they were built on the same system, it was no surprise when the same issue recurred. There was the briefest of flashes of an error message just before the reboot happened, and so, being the resourceful problem-solvers we were, Kheng Meng whipped out his phone that could record 60fps video and captured footage of the screen just before reboot.
I always use Quicktime to do my video edits, and one of the features I’m fond of is the Trim function. It allows you go into fine-grain frame-by-frame editing by holding the slider for a second. Anyway, the footage managed to catch the following error message:
BUG: Bad page state in process swapper/0 pfs:007d4

Googling wasn’t particularly helpful and so we decided to give Damn Small Linux (DSL) a try, since it was relatively older, it perhaps would work better with the 486, who knows? So we burned the image to a rewritable CD and tried again.
Surprise surprise, it managed to boot up (with the help of a smart boot loader on floppy) without crashing, but somehow it could not read the image on the CD. Turns out, the drive couldn’t recognise rewritable discs. Luckily, we were 100m away from the IT mall, so 20 minutes later, we had a stack of blank CDs to work with.
Again, there were multiple versions of DSL we could use, and we settled on using the CD image of 4.4.10 and 4.11.RC2. If all else failed, we’d go with the floppy disc option, because we could 💪.
This is where my memory gets fuzzy. I can’t remember if we tried the RC2 version, and encountered some error BEFORE I went out to buy the CD-Rs or after that. But the point is, we managed to get the boot sequence all the way to the boot options menu and beyond on 4.4.10.
4 hours to install an OS
It was lunchtime when I made my IT-mall-blank-CD-buying run, so there was a lot of typing with one finger while shovelling food in my mouth. Oh, but when we got to the part where ALL the hardware components were recognised correctly, happy dance 💃.
After mucking around a bunch of boot options for another half and hour or so, we realised that we should have just typed install when the boot prompt came up 😠. In our defence, the instructions looked like this:
But it’s all good. Such things are expected when it comes to doing unorthodox things to hardware. Wait till you see all the other snags we hit. It’s all part of the fun, my friends.
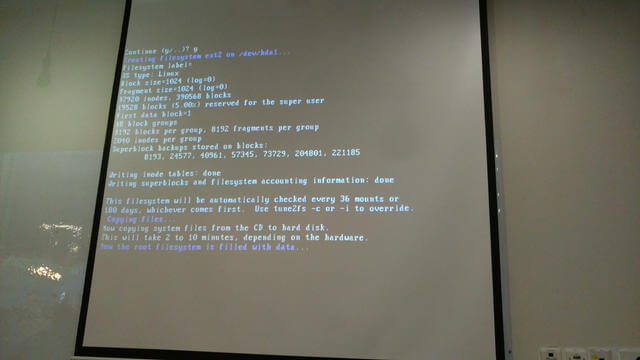
Before installing onto disc, we wiped the existing content and repartitioned the drive. The first time we did it, we ambitiously allocated 512mb for the Swap and the remaining free space as the working drive, which would be bootable. That was around 75.7gb or so? Bad idea.
It took soooo long to write. AND I think I screwed up the part where it asked if a boot loader should be installed, and I pressed Enter, assuming the default option of (y) would be selected, instead of explicitly entering y. So it’s either the boot loader wasn’t installed, or we allocated too much space for the system to recognise. I think it was the former. But regardless, the system wouldn’t boot from HDD, so Take 2.
The second time we tried to install to disc, the boot loader wouldn’t read the disc image, even after we tried to clean it with a lint-free microfibre cloth 😩. Fortunately, we had that stack of extra blank CDs lying around, so Kheng Meng burned a new copy, plus verified the disc. It actually worked, we don’t know why.
This time we allocated a lot less space for both partitions, and boy did that speed things up. Although it wasn’t blazing fast or anything, it was much faster than the first time we did the install. Priming is everything, folks.
Our baby has come to play
It was around 3pm when we got DSL to boot off HDD successfully. So we were ahead of schedule (in my mind) and I proceeded to happy dance a couple of times. Next question was, we need to do something with it.
DSL comes with a lot of features already, if you refer to the What can fit in 50 megabytes?! section of the wiki, you’ll see the full list. It comes with SSH, a web server and media player. The first idea was to serve the hackathon website off our lovely 486. All the code for the site was open source on Github anyway.
But we hadn’t resolved the internet connectivity issue. Both Kheng Meng and I brought our portable wifi routers, but his had more functionality. We realised that the venue wifi had a lot of limitations. The original plan was to use his router as a client, then connect via Ethernet to the 486, which worked but no internet access. Eventually, the setup worked with his phone as a mobile hotspot 🤷.
And we were in business! Sort of. Even though the router had internet access, it seemed like the 486 had no IP address allocated to it. DCHP server not running, maybe? But Google immediately provided me with an answer. I can’t explain my Google search technique other than I go with my gut on which keywords to use, and which result to pick. I realised I almost never take the first option, go figure.

Anyway, this was the result I picked first, maybe the word “tip” made me feel better. I wondered aloud, “What does pump do?” just as I entered the command, because neither of us ever seen it before. But lo and behold, our baby got connected to the interwebs!
We also started up the SSH client for file transfer and concurrent access. Turns out the SSH version on DSL was too old for my Mac to connect to, but Kheng Meng ran Linux Mint on his T430 and that worked great. So here’s our file transfer strategy (because we didn’t want to blow all of Kheng Meng’s data in one afternoon).

My portable wifi router was called into play to set up a separate network (unfortunately not connected to the internet), uncreatively called 486, for other devices to access our machine.
- Download whatever files off my Mac, connected to venue wifi
- Transfer said files to the T430 via USB flash drive
- Connect to the 486 network and secure copy the files over to the machine
Serving a website
The web server that DSL came with was Monkey. And in theory, all we had to do was dump our website files into the /opt/monkey-0.9.2/htdocs/ folder and start the server. File transfer wasn’t a problem, but I just couldn’t figure out how to run the server, because the instructions were for a Desktop environment and we were in terminal because X had issues.
Eventually Kheng Meng found the command was
/opt/monkey/bin/banana start
and we added that to the /opt/bootlocal.sh file so it would start automatically on reboot. Did I mention I loved the monkey banana concept? 🐒🍌
Web server, done! As long as you were connected to our 486 network, you could access the website on port 80, no issues.
Playing music
DSL comes with a media player, but that was in the Desktop environment. Neither was Apt enabled by default. But it wasn’t too tricky to turn it back on.
sudo dpkg-restore
did the trick and
apt-get update
ran without any issues.
Kheng Meng installed Sox so we could play audio files from the command line, and tested it out on a random file he had on his PC, which was the Cantina theme from Star Wars (we’re getting into the Star Wars mood now, aren’t we). Once that worked, my rubbish brain wanted to play 8-bit style music instead.
And I came across this marvellous piece of work by Lord Vinheteiro:
Remember that we were hooked up to the venue’s projector system, which included sound. And thus while everyone was hustling away at their hacks, they would hear intermittent clips of audio files we were trying to play. Of course, we didn’t want to be annoying and they ran for a few seconds each time, enough for us to gauge volume control etc.
How’s about that X display?
At this point, we figured we’d try tackling the X problem. Because the error message did suggest we configure X using xsetup.sh, and that’s what we did. During install, we went with xfbdev because the prompt mentioned it was for lower end systems.
We went with xvesa instead this time, and started off with the lowest resolution settings we could use, 640x480 on 4-bit colour depth. This actually worked and we got into the Desktop environment. Unfortunately, trying to open anything other than a terminal window wouldn’t work. The apps just crashed before loading.
This is one part we never figured out, because we configured and reconfigured using xsetup.sh more than 10 times but we only saw 2 changes on the Desktop. The first time (and because we didn’t take a photo, you can only rely on my words 🤷) was an almost grayscale affair, with a rather bad emulation of transparency for the background involving a whole lot of pixelation. There was a system stats widget built into the desktop but it was hard to read because of that.
We tweaked the settings to 800x600 and 8-bit colour depth but repeated reboots didn’t seem to stick. Then, out of the blue, the colours kicked in, though we don’t know if that was a good thing or a bad thing. Because the increased colour depth also made the contrast terrible. You can sort of see it if you scroll up to the pictures which show how we hijacked the venue projectors.
I also learned how to set the background to a solid colour using
bsetbg -solid COLOUR
and the fun part is that the colours are not what they say they are. For example, black turned out to be blue, white turned out to be black, green gave me this pink-ish hue, orange gave me purple and so on. Eventually we settled on red, because it gave us a lovely neon green background, making the dark text show up quite clearly.

Once the colours came in, it seemed that the Desktop environment stabilised itself as well, and we could use all the apps that were installed without them crashing. Trade-offs, I suppose. There’s a life lesson in here somewhere.
Presentation time
There were quite a lot of teams, and many with really funny and ridiculous ideas. There might be an overall recap somewhere in the future by the organisers, I don’t know. When it was our turn, we had way too much stuff going on to be standing in front of everyone. So we did our presentation at our round table of stuff.

Update: the video of the presentation has been released. This is the most classic example of how Singlish sounds like for everyone who is not from Singapore or Malaysia, and don’t know what this glorious language is.
The overall mood of the hackathon was really light and fun, so the crowd response was way more enthusiastic than a typical meetup. It’s not a bad thing per se, but a normal meetup audience in Singapore and Malaysia (my anecdotal experience, take with pinches of salt) is quite reserved, with minimal questions or comments. Not tonight though 😆.
At the end of it, we managed to garner enough votes for third place! Snacks for Kheng Meng and I! 🎉 I had the best time, AND we managed to achieve our original objective, so I’d consider this a successful day out. Working with Kheng Meng was really great and hopefully we’ll be hacking some other old hardware again soon.
Originally published at www.chenhuijing.com on December 10, 2017.


