Now that our player can be damaged by our enemies, we can go ahead and implement the functionality so that they can die, and if they have died, the game is over, and a game-over screen is displayed. Later on, we’ll build on this game-over system so that we get redirected toward the Main Menu screen.
WHAT YOU WILL LEARN IN THIS PART:
· Further practice with the AnimationPlayer node.
· Further practice with the CanvasLayer nodes.
In your Player scene, add a new Label and ColorRect to your UI node. Rename the ColorRect to “GameOver”. It should look like this:

Change the GameOver node’s size to the size of your game window (x: 320, y: 180). Also, change its Color property to #d6c376.

Select your Label node and change its text to “GAME OVER!!!”. Make sure that it is in uppercase, and change the anchor preset to be centered.

Let’s assign a new Font to this label. Underneath Control > Theme Overrides > Fonts, Quick Load a new font and select the font to be “Schrödinger.tff”. Set the font size to 20.

Now hide your GameOver node by clicking on the eye icon next to it.

In your Animations panel at the bottom window, create a new animation by clicking on the Animation label. Call this animation “game_over”.


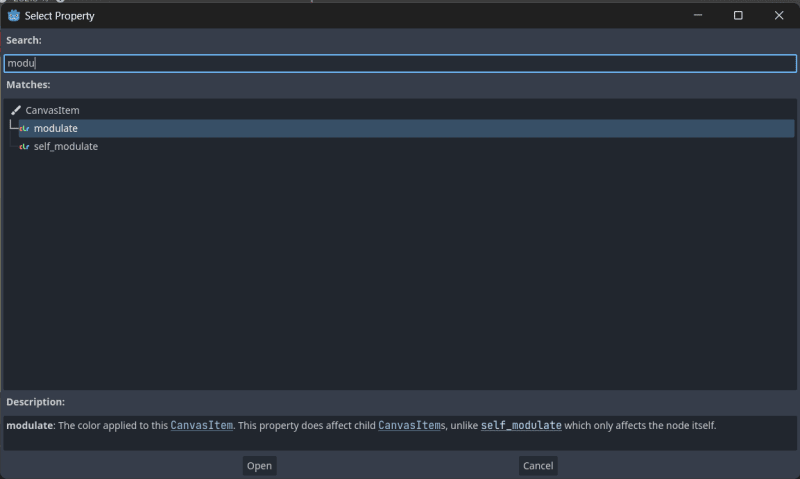
For this animation, we want our game over screen to slowly be revealed if our player dies. Therefore, we will change the ColorRect node’s (GameOver) modulate property. Add a new Property Track and connect it to your GameOver node.

Select the modulate value property and add two keys — one at keyframe 0 and the other one at keyframe 1.

Select the first keyframe (0) and change the Alpha value in your Value property to 0. This is because we want the window to go from invisible to visible. You can play the animation to see the effect we’re going for.

Now in your Player’s damage code underneath our death conditional, let’s play this animation.
    ### Player.gd

    # older code

    # ------------------- Damage & Death ------------------------------
    #does damage to our player
    func hit(damage):
        health -= damage
        health_updated.emit(health, max_health)
        if health > 0:
            #damage
            animation_player.play("damage")
            health_updated.emit(health, max_health)
        else:
            #death
            set_process(false)
            animation_player.play("game_over")
If you run your scene and your player gets shot enough times for its health value to fall below 0, your game over screen should show. We’ll make this screen pausable later on when we return it to our main screen.

Now our player can “die” and the game notifies us that our game is over. We’ll build on this in the next few parts to improve on this system, but in the next part, we’re going to add our Level and XP functionalities which will increase our XP and Levels after completing quests or killing enemies. Remember to save your project, and I’ll see you in the next part.
Your final source code for this part should look like this.

FULL TUTORIAL
The tutorial series has 23 chapters. I’ll be releasing all of the chapters in sectional daily parts over the next couple of weeks.
If you like this series or want to skip the wait and access the offline, full version of the tutorial series, you can support me by buying the offline booklet for just $4 on Ko-fi!😊
You can find the updated list of the tutorial links for all 23 parts in this series here.


