Follow me on Twitter, happy to take your suggestions on topics or improvements /Chris
First time I heard the name I thought this sounds like a Blaze of fire. That's quite the association. Blazor is Microsoft's new answer to using the .Net platform and C# language everywhere, on frontend as well as backend. Let's find out how and how you build apps with it in this article.
In this article, we will cover:
- Why Blazor, is this another Silverlight plugin or something else, something better? Let's find out
- What, Let's talk about what Blazor is and how different Hosting Models allows you to host Blazor on frontend and backend. This comes with different pros and cons so let's talk about those. The choice is ultimately yours
- Demo, together we will build a Blazor demo that shows how to work with routing, components, and HTTP
References
There are some excellent docs you can have a look at to learn more:
WHY
Ok, so here's the sales pitch for Blazor.
Blazor promises to:
- Create rich interactive UIs using C# instead of JavaScript.
- Share server-side and client-side app logic written in .NET.
- Render the UI as HTML and CSS for wide browser support, including mobile browsers.
Nice, so you are saying I as .Net Developer would probably prefer to write C# all the time instead of doing a bunch of context-switching between JavaScript and C#?
Precisely. On top of that, you will be able to share code between backend and frontend given one of the hosting models
Share code, now that's interesting
There's no plugin this time.
So not a new Silverlight?
No.
You said, instead of JavaScript, what do you mean?
You will be able to write C# everywhere. JavaScript is quite popular nowadays but let's face it, if you work a lot with C# it's a context switch to suddenly learn a new language, new paradigm and so on. You also have the whole reuse argument. Wouldn't it be great if you could reuse a lot of your logic and models and use them on both frontend and backend?
Ok, you got my attention :)
Good, let's continue.
It renders WebAssembly
WebAssembly, I think I've heard about it, can you tell me more?
Sure,
WebAssembly, also known as WASM, not be confused with Wassim ;), whom you should follow btw, excellent OSS developer :)
Did you follow? Yea? Good :)
Ok back to WASM, it is an open standard that defines a portable binary code format for executable programs, and a corresponding textual assembly language
Wait, assembly language in the browser, that must be super fast?
Yes exactly. That means you can get high-performance apps in the browser.
So no more JavaScript then?
Well, no, they are meant to co-exist, it's a long story.
Ok
WHAT
Let's try to cover two different topics here:
- Architecture, how does Blazor work, how does it communicate changes, etc? Let's be visual here and show some nice pictures
- Hosting models, You can host Blazor on client-side and server-side, let's try to explain the differences
Architecture
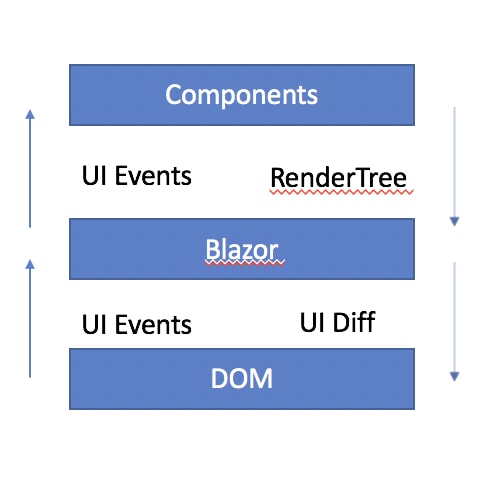
Let's establish one thing. Blazor is a client-side web UI framework. Thereby it handles user interactions and renders updates when needed. Much like Angular, React and Vue it's components rendered on an HTML page:
The components aren't rendered to the DOM directly but rather to a virtual/in-memory representation of the DOM called a RenderTree. When a change happens a diff is calculated and is applied to the DOM like below image:
Hosting models
One of the first things we need to realize about Blazor is that it can be hosted in different places. It can be hosted in IIS just like ASP.NET Web Forms apps. Blazor apps can also be hosted in one of the following ways:
- Client-side in the browser on WebAssembly.
- Server-side in an ASP.NET Core app.
Client-side
Blazor WebAssembly apps execute directly in the browser on a WebAssembly-based .NET runtime. Blazor WebAssembly apps function in a similar way to front-end JavaScript frameworks like Angular or React.
Based on what you told me about WebAssembly, sounds like it could be real fast?
It is. Or will be, Blazor is still being worked on and getting faster and faster.
What else?
Instead of writing JavaScript you write C#. The .NET runtime is downloaded with the app along with the app assembly and any required dependencies. No browser plugins or extensions are required.
C# in the frontend, sweet :) and no plugins, so it's not the next Silverlight?
Correct.
There has to be a downside to this, surely I can't use the entire .Net platform in the Browser?
Well, you can use .Net standard libraries but of course, the app is executed in the browser security sandbox.
Meaning what?
You can't access the file system or opening arbitrary network connections
Oh ok, yea that makes sense.
Any more questions?
Yes actually, what about deployment?
Deployment, you can use GitHub Pages or static site hosting.
Nice :)
Server-side
In this hosting model approach, Components and rendered output are decoupled from each other. So we have two different processes, one that tends to components and one that tends to UI updates.
In the Server-side approach, the components are run on the Server and not client-side like the former hosting model. So for changes to reach the Server and thereby the components, there needs to be a real-time connection. After that it's pretty much the same idea as the former hosting model, we render our components, we produce a UI diff and send that to the browser and ends up applying that to the DOM.
What Hosting Model should I choose?
Now we are asking the right questions. Let's cover the pros and cons of each hosting model.
Client-side model
PROSs
No server-side dependency, it just works stand alone without the need for a server
Offloading server, client takes on more responsibility and does all the work
CONs
restricted by browser, the capabilities of the app is restricted by the browser
needs to support WebAssembly, you need capable hardware and software that supports WebAssembly
size, the payload of the app is bigger and thereby it takes longer to load the app
limitations on .Net, runtime and tooling support is less mature than the serverside version
Server-side model
PROs
size, size is much smaller and the app loads faster
tooling/debugging, this runs on the server so it takes full advantage of things like existing tooling and debugging
can use full .Net, can use any .Net Core compatible .Net APIs
CONs
- latency, every interaction is a network call
- no offline, if the client fails to connect to the server the app stops working
- scalability, the server must manage client connections and client state
As you can see above there are different PROs and CONs and you have to decide what you can live with.
DEMO
Enough theory right, you want to see some code?
Yes pleeease
Ok then we will do the following:
- Prerequisites, let's installed the needed libraries like .Net Core 3.0 and templates that we need to scaffold Blazor apps
- Components, a component is a central concept, let's learn how to define a component and work with inputs and outputs
- HTTP, let's learn how to work with HTTP
- Routing, An app almost always consist of more than one page, let's learn how to set up routing and navigate between pages
Prerequisites
As Blazor is constantly updated, ensure you are looking at the latest instructions for installing it:
You need to download .Net Core 3.0. Check out this link to find the correct distribution for your OS
Additionally, you need templates so you can scaffold a Blazor app. Pop open a terminal and type
dotnet new -i Microsoft.AspNetCore.Blazor.Templates::3.0.0-preview9.19465.2
Once we've done this we will have gotten some Blazor specific templates namely blazorwasm and blazorserver. Let's create a project from blazorwasm like so:
dotnet new blazorwasm -o blazor-web
This should scaffold a bunch of files for you, it should look something like this:
Now that we have a project let's first compile it:
dotnet build
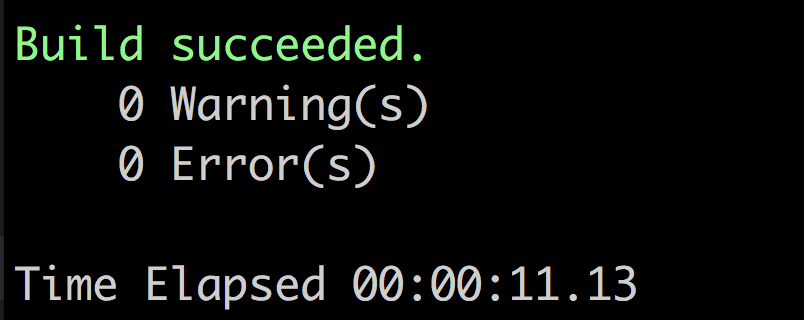
This should not only compile it but implicitly fetch all needed NuGet packages. You should see something like this:
Let's thereafter run this example and see what we got:
dotnet run
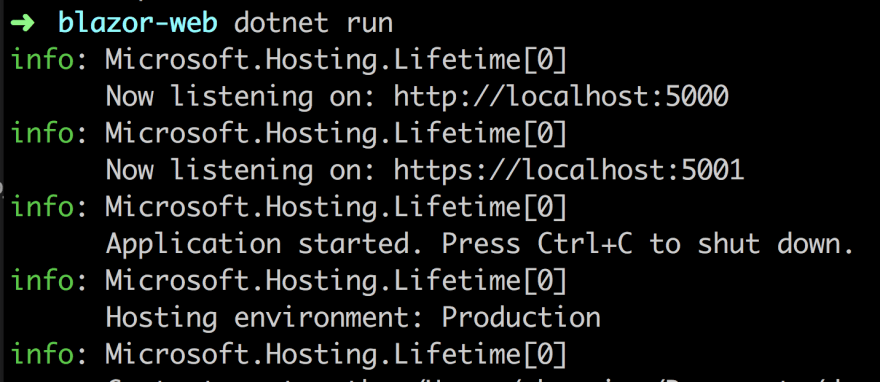
You should see the below print in the terminal:
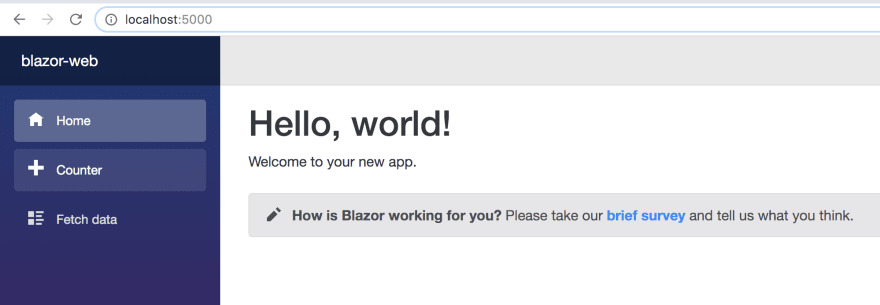
Next, let's go to http://localhost:5000
GREAT, everything works! :)
Let's aim to understand all the building blocks next.
Components
Blazor is a component centric framework. That means everything in our app is made up of components.
Let's try to figure out how our app is made up. The root component is called App and can be found in the file App.razor. The content of that file is as follows:
<Router AppAssembly="@typeof(Program).Assembly">
    <Found Context="routeData">
        <RouteView RouteData="@routeData" DefaultLayout="@typeof(MainLayout)" />
    </Found>
    <NotFound>
        <LayoutView Layout="@typeof(MainLayout)">
            <p>Sorry, there's nothing at this address.</p>
        </LayoutView>
    </NotFound>
</Router>
The above is telling us two things.
-
Normal routing, Normal routing is taken care of by the
Foundcomponent. It used theMainLayoutcomponent to set up aDefaultLayout -
Not found, the component
NotFoundhandles any non-defined routes and outputs an error text
MainLayout
Let's have a look at the MainLayout component next. It can be found under Shared/MainLayout.razor and looks like this:
@inherits LayoutComponentBase

<div class="sidebar">
    <NavMenu />
</div>

<div class="main">
    <div class="top-row px-4">
        <a href="http://blazor.net" target="_blank" class="ml-md-auto">About</a>
    </div>

    <div class="content px-4">
        @Body
    </div>
</div>
The above is telling us we have two sections sidebar and main. sidebar renders a navigation menu using the component NavMenu and main renders the content using @Body.
Index component
Let's try to understand components next by looking at a very simple one called Index, which is stored in the file Pages/Index.razor:
@page "/"

<h1>Hello, world!</h1>

Welcome to your new app.

<SurveyPrompt Title="How is Blazor working for you?" />
At the top of the file we @page that tells us what route it handles, in this case, /, the default route. Then we have a portion of HTML.
Counter
This component can be found under Pages/Counter.razor and looks like this:
@page "/counter"

<h1>Counter</h1>

<p>Current count: @currentCount</p>

<button class="btn btn-primary" @onclick="IncrementCount">Click me</button>

@code {
    int currentCount = 0;

    void IncrementCount()
    {
        currentCount++;
    }
}
This is a bit more interesting as it demonstrates how to show values and set up methods. At the top, we can see that it handles the route /counter.
Next, we see how we output the variable currentCount using the Razor directive @.
After that we see how we set up the method IncrementCount() to handle clicks on the button:
<button class="btn btn-primary" @onclick="IncrementCount">Click me</button>
Lastly, we use the Razor directive @code to write some C# code
@code {
    int currentCount = 0;

    void IncrementCount()
    {
        currentCount++;
    }
}
As you can see above we declare our variable currentCount and our method IncrementCount(), looks almost doable right? :)
Component communication
The whole point of having components is to be able to break apart your app in different components, each with their own responsibility. Therefore, let's add the Counter component to our Index component like so:
<Counter />
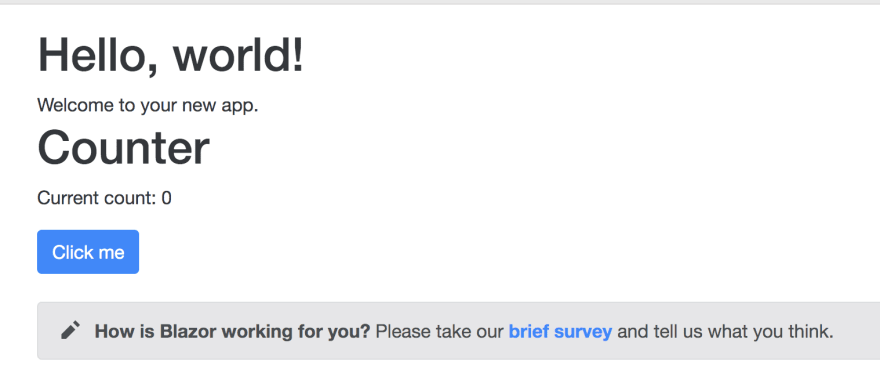
Save and relaunch the app. Your browser should now look like this:
Component input
One usually differ between smart and dumb components. Smart components are the ones that hold state and dumb components only render data. An example of a dumb component is a ProductDetail component that only lists the data it's been given. So how do we set that up? Well, let's do the following:
-
Create a file
ProductDetail.razorunderPagesdirectory - Create content that renders a title and description
-
Place component in
Indexcomponent
First, let's add some code to ProductDetail.razor:
<h2>@title</h2>
<div>@description</div>

@code {
  string title = "Product detail";
  string description ="description";
}
Next, let's place it in the Index component <ProductDetail/> and then save and start up our app. It should now look like this:
We should instead of relying on static data inside of ProductDetail use an input property.
So how do we do that?
We do the following:
-
Use a decorator on a variable called
Parameter -
Make the variable
publicand make it aproperty - Test it out
In our ProductDetail component, change it to the following:
<h2>@title</h2>
<div>@description</div>

@code {
  [Parameter]
  public string title { get; set; } = "Product detail";

  [Parameter]
  public string description { get; set; } ="description";
}
We have done steps 1+2, now let's try it out by assigning it values in our Index component:
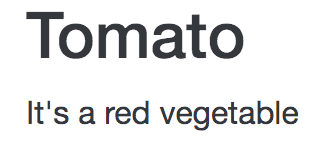
<ProductDetail title="Tomato" description="It's a red vegetable" />
and the result in the browser looks like so:
Works :)
Component output
What do we mean by component output? We mean how do we communicate from child component to parent component. The answer via a function. Maybe we should go back to a scenario where we do just that. Let's talk a Todo app. A Todo app is the new hello world, a starter app where we learn some fundamentals in the chosen framework. One reason is that it covers a lot of great concepts such as displaying a list but also that we might want to communicate from a child component to a parent component when we typically click a specific item in the list.
A simple list component can be created like this:
// Todos.razor

<div>
  <h2>Todos</h2>
  @foreach (var todo in todos)
  {
      <div>@todo.title</div>
  }
</div>

@code {
  public class Todo {
    public string title { get; set; }
  }

  List<Todo> todos = new List<Todo>(){ new Todo { title="clean" }, new Todo { title="shop" } };
}
That's great, it showcases the @foreach helper. However, it doesn't show component communication from child to parent. So let's build a new component for that and let's call it Products. Let's define it like so:
// Products.razor

<h2>Products</h2>

You clicked: @message

@foreach (var item in products)
{
    <ProductDetail OnClick="Clicked"  title="@item.Title" description="@item.Description" />
}

@code  {
  string message = "";

  List<Product> products  = new List<Product>
  {
    new Product(){  Title = "book", Description = "a Book" },
    new Product(){  Title = "DVD", Description = "a DVD" }
  };

  void Clicked(string name)
  {
    message = name;
  }

  public class Product
  {
    public string Title { get; set; }
    public string Description { get; set; }
  }
}
Let's zoom in on the interesting part:
@foreach (var item in products)
{
    <ProductDetail OnClick="Clicked"  title="@item.Title" description="@item.Description" />
}
We are rendering a number of ProductDetail instances and we assign the property OnClick and give it the value Clicked, which is a function looking like this:
void Clicked(string name)
{
  message = name;
}
A very simple function that takes a string as an input parameter.
To understand however how ProductDetail communicates with the parent we need to see that components definition:
// ProductDetail.razor

<div>
  <span>@title</span>
  <span>@description</span>
  <button @onclick="@(() => OnClick.InvokeAsync(title))" >Click me</button>
</div>

@code {
  [Parameter]
  public string title { get; set; } = "Product detail";

  [Parameter]
  public string description { get; set; } ="description";

  [Parameter]
  public EventCallback<string> OnClick { get; set; }

}
There are two pieces here, the first is the definition of the parameter OnClick, looking like this:
[Parameter]
public EventCallback<string> OnClick { get; set; }
Have a look at the above type EventCallback<string>, this means that when invoked it needs to pass a string as a parameter.
The other part of the puzzle is how to invoke it? The answer is:
<button @onclick="@(() => OnClick.InvokeAsync(title))" >Click me</button>
From the above we see we call InvokeAsync() with a string argument being the title of the component and that's how it's done. If we want we can pass something more unique to our parent like an id instead, but then we need to extend our component with such a parameter.
Dealing with HTTP
Ok, we covered a lot already, how to start, how the layout works, how you architect with components and how they communicate. What's left? A lot is the answer. I would just like to show one more thing before we round off this article, namely working HTTP.
For this purpose, we will create a component Planets. It will communicate with an external endpoint, fetch data and transform it into something we can render. Let's have a look at the definition and then explain what's going on:
@inject HttpClient Http

<div>
  @if(request == null)
  {
    <div>Loading...</div>
  }
  else
  {
    <div>
    @foreach (var planet in request.results)
    {
        <div>@planet.Name</div>
    }
    </div>
  }
</div>

@code {
  PlanetRequest request = null;

  protected override async Task OnInitializedAsync()
  {
    request =
        await Http.GetJsonAsync<PlanetRequest>("https://swapi.co/api/planets");
  }

  public class PlanetRequest {
    public Planet [] results { get; set; }
  }

  public class Planet {
    public string Name { get; set; }
  }
}
There are three interesting things that are going on:
- Injecting HttpClient, this a service that helps us do HTTP calls
-
Invoking HttpClient, we use the method
GetJsonAsync()to fetch a JSON from the defined endpoint -
Creation of a result type, we are creating the type
PlanetRequestthat based on the incoming JSON structure is able to pick out the relevant data found on the propertyresults
Injecting HttpClient
This is done at the top of the page with this code:
@inject HttpClient Http
We are asking for an instance of type HttpClient and we name it Http.
Invoking HttpClient
Here we are actively fetching the data. We do so by defining a life cycle method OnInitializedAsync() that is guaranteed to run on initialization.
protected override async Task OnInitializedAsync()
  {
    request =
        await Http.GetJsonAsync<PlanetRequest>("https://swapi.co/api/planets");
  }
We can see above we declare it as async because we use await to wait for the Task to resolve with our data.
Creation of a result type
Lastly, we have the definition of a result type PlanetRequest that models what the incoming JSON looks like which is a shape like this:
{
  "results": []
}
Summary
That's all we want to cover for now or this would be a book. There is lots more to say about Blazor but this should be a nice and gentle intro and hopefully convey that Blazor is a component-oriented framework that allows you to write in C# while still using things you know such as HTML and CSS.
Blazor is a game-changer, this is just the beginning. :)


