
Hi I am Francesco, and In this short article, I will show you a short step-by-step guide to write your first "Hello World" in Solidity.
Do you prefer the Video Version? just click the link below.

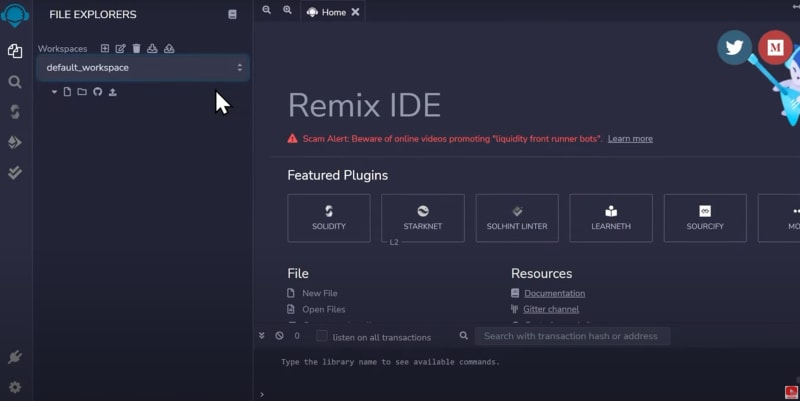
Remix IDE
Visit http://remix.ethereum.org, and be sure to select "Default Workspace" if it isn't selected already.
HelloWorld.sol file
In Solidity, the file extension we use is .sol.
Create a new file called "HelloWorld.sol" by clicking the icon 🗒️at the top-left (see the pic below).
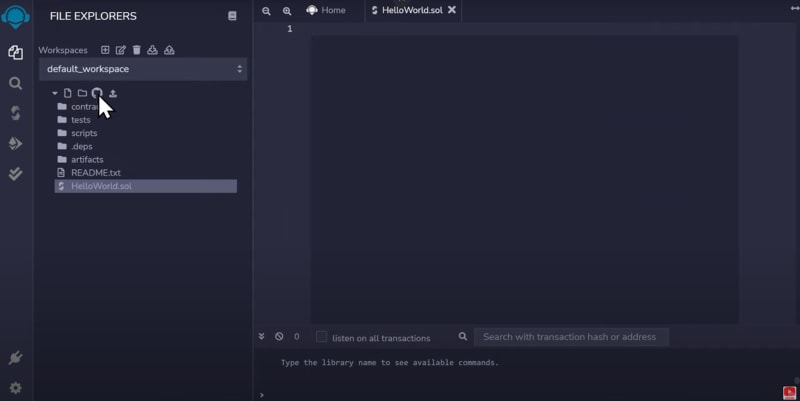
Then Populate the HelloWorld.sol file
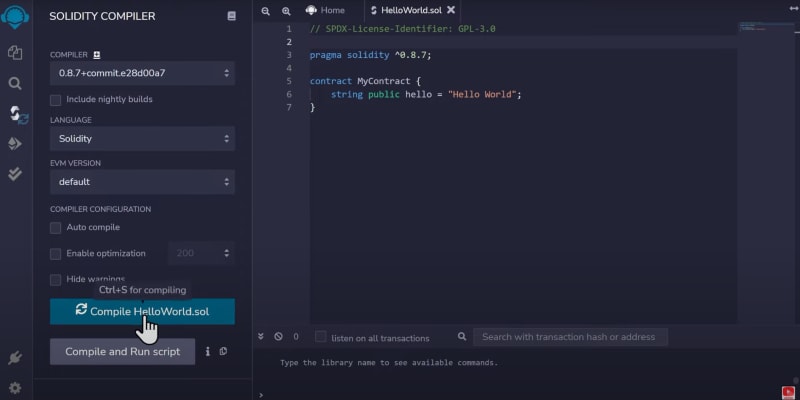
// SPDX-License-Identifier: GPL-3.0

pragma solidity ^0.8.7;

contract MyContract {
    string public hello = "Hello World";
}
The first line is the license. We write that to avoid compiler warnings.
"pragma solidity" is the version we want to use.
For now, you can think of a "contract" as a class (it's a very similar concept if you are familiar with object-oriented programming).
Personally, I like the fact that Solidity uses reserved keywords such as "contract", and "address", which are very specific to smart contracts and it makes it very clear to understand what's going on.
Compile the "HelloWorld.sol" file
Click on the Solidity logo on the left to access the Compiler.

Leave everything as default and click the "Compile HelloWorld.Sol" button
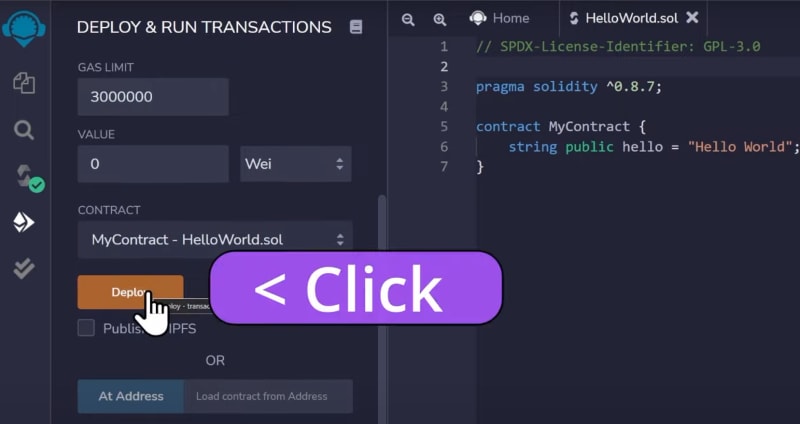
Deploy to test network
One of the reasons why using the Remix IDE is so convenient is that we can deploy automatically on a test network in the browser without the need to set up a whole environment, which is not very simple for someone who is getting started writing Solidity code.
Click the "Ethereum-like" icon on the left, that says "Deploy and run transactions".

Click the orange "Deploy" button:
Click the ">" next to "MYCONTRACT AT ..." at the bottom. It's a bit hard to spot if you are not used to that because it's gray. Here is a picture to give you an idea.

Last step: "Hello World"
Another reason for using Remix is that we can test the value of the variables directly inside the browser!
Click on the "hello" blue button to check the value of the variable we just defined.

Done!
If you prefer the video version, you can check this 109 seconds video
I hope this article has been useful. If you want to stay updated you can find me here: http://francescociulla.com
For any questions and doubts, just leave a comment.
Francesco.


