What You Will Need
- ComponentOne Studio Enterprise
- Visual Studio 2022
Controls Referenced
Tutorial Concept
Learn how to create an ASP.NET web service for handling CSV data files and displaying them in an ASP.NET Core MVC UI.
In a data-driven era, the ability to seamlessly manipulate and transform information has become essential for businesses and developers. Whether you're immersed in a compact personal project or working with massive data sets in a corporate environment, the ability to perform CRUD (Create, Read, Update, Delete) operations is essential. However, these operations are often tedious tasks that waste valuable time, especially for data neatly stored in CSV files.
Opening a seamless path to working with CSV data in C# applications, Mescius offers the ComponentOne CSV Data Connector class library, a powerful solution designed to improve your data management experience. In this blog post, join us on a journey through CRUD operations and explore how the ComponentOne CSV Data Connector can help streamline your data-related tasks.
What is ComponentOne CSV Data Connector?
ComponentOne Data Connectors can be used for effective data connectivity and are based on the ADO.NET architecture. They are powerful data providers that enable a common interface to access different kinds of data sources based on established data access technologies. They effectively hide the complexity of connecting and transacting in different ways for each data source, enabling the productive development of data-related applications. The following diagram shows the simplified architecture of the Data Connector library.

The ComponentOne CSV Data Connector acts as a transformative bridge, providing users with the unique ability to query CSV files as if they were traditional databases. This exciting feature allows users to run SQL queries directly on CSV files, just as in a regular database.
We will use a ComponentOne ASP.NET Core FlexGrid to display and edit the data on the client side (browser). You can download this sample to follow along with the blog. Now, let's take a closer look at the CRUD operations with the following steps:
- Setting Up the Environment
- Creating the CSV Service
- Setting up the FlexGrid
- Methods definition in Controller
- Add the FlexGrid with BatchEdit Action
Setting Up the Environment
First, we need to create the ASP.Net Core Web Application. Follow the steps below to create a fresh application.
- Open Visual Studio 2022
-
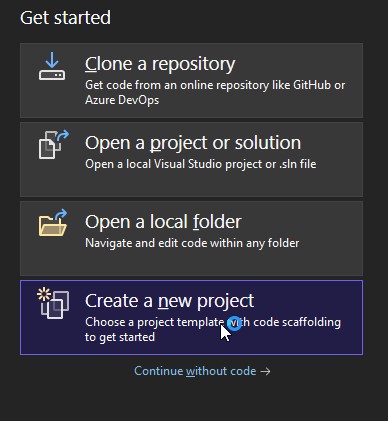
Click on the “Create a new project” option
-
Select the template ASP.NET Core Web App (Model-View-Controller) as shown below. Then, click on "Next."

Provide the project name and location folder and click "Next."
-
In this step, we need to select the Framework version. For this application, set it as .NET 8.0. Along with the Framework version, select the following settings as shown below:
a. Authentication Type: The Authentication type can be selected based on individual requirements. We are not using Authentication for now, so this will be set to "None."
b. Configure for HTTPS: This setting determines whether or not to execute the project locally with HTTPS protocol, which is selected by default.
c. Enable Docker: This allows us to add the required Docker file to the project if you would like to host the project using Docker.

Click on "Create," and the base project will be ready for development.


In the project, we will use ComponentOne FlexGrid to perform the operations on CSV files and ComponentOne CSV Data Connector to update the CSV files on FlexGrid operations. Hence, we need to install the following NuGet Packages:
- C1.AspNetCore.Mvc
- C1.DataConnector
- C1.AdoNet.CSV
After installing the required NuGet Packages, we must set up CSV Service using the ComponentOne CSV DataConnector for the project to perform the CRUD operations. Next, we need to create the CSV Service.
Creating the CSV Service
To conduct operations on CSV files, we must first add them to the project. To store the CSV files, we would create a folder called "CSVFiles" in the "wwwroot" folder. We will place the required CSV files in the CSVFiles folder. After adding the CSV files, right-click on them and select "Properties." Here, we would set "Copy to Output Directory" to "Copy Always," as shown below:

After importing the CSV files to the project, we would define a Model class based on the characteristics and types of the CSV files.
Below is an example of code for the Model class named Country.cs, which has properties based on the country.csv file.
    public class Customer
    {
         public int ID { get; set; }
         public string Country { get; set; }
         public string Name { get; set; }
         public double Amount { get; set; }
         public bool Active { get; set; }
    }
After adding a model class based on CSV files to perform CRUD operations, we will create a new folder called "Services" and add our CSVService.cs class to perform CRUD operations on CSV files.
To perform operations on CSV files, we need to provide the location and name of the CSV files to the class. We would get this information using the class constructor.
    public class CSVService
    {
         private string _csvConnectionString { get; set; }
         private string _fileName { get; set; }
         public CSVService(string filePath, string fileName)
         {
             _fileName = fileName ?? string.Empty;
             _csvConnectionString = $"Uri='{filePath}'";
         }
    }
After completing the basic setup for the CSV Service, we will write further code to perform CRUD operations with CSV files using this CSV Service. We will write the methods to interact with the data in the following order:
- Read Data
- Create/Add Record
- Update Data
- Delete Data
Read Data
When reading or fetching data from the database or data source, the read operation is the primary function we would require to view the records in UI before performing further operations. Hence, we will write our first method to fetch the data from the CSV files as an array. To achieve this, copy and paste the following code:
    public List<Customer> ReadCustomers()
    {
        Console.WriteLine("Query all Accounts...");
        // Fetch data
        // Create a connection to the CSV database using the provided connection string
        using (var con = new C1CSVConnection(_csvConnectionString))
        {
            con.Open();
            // Get schema information for the specified file
            var table = con.GetSchema("columns", new string[] { _fileName });
            // Create a command for SQL query
            var cmd = con.CreateCommand();
            // Provide command
            cmd.CommandText = "Select * From " + _fileName + " ORDER BY ID DESC";
            // Execute the SQL query and retrieve the data
            var reader = cmd.ExecuteReader();
            // Initialize a list to store the results
            List<Customer> customers = new List<Customer>();
            while (reader.Read())
            {
                // Create a new instance of the Customer class
                Customer customer = new Customer();
                // Populate the Customer object with data from the database
                customer.ID = reader.GetInt32(reader.GetOrdinal("ID"));
                customer.Country = reader.GetString(reader.GetOrdinal("Country"));
                customer.Name = reader.GetString(reader.GetOrdinal("Name"));
                customer.Amount = reader.GetDouble(reader.GetOrdinal("Amount"));
                customer.Active = reader.GetBoolean(reader.GetOrdinal("Active"));
                // Add the populated Customer object to the list
                customers.Add(customer);
            }
            // Return the list of populated Customer objects
            return customers;
        }
    }
Create or Add Record
After writing a method for reading the data, we will write a method to add the new records to the CSV file:
    public bool Add(Customer customer)
    {
        // Display a message indicating that a new record is being inserted
        Console.WriteLine("Inserting a new record...");
        // Create a connection to the CSV database using the provided connection string
        using (var con = new C1CSVConnection(_csvConnectionString))
        {
            con.Open();
            // Create a command for SQL insert
            var cmd = con.CreateCommand();
            // Generate the SQL command text for inserting the new customer record
            var cmdText = $"INSERT INTO {_fileName} (ID, Country, Name, Amount, Active) " +
                          $"VALUES ({http://customer.ID }, '{customer.Country}', '{customer.Name}', {customer.Amount}, {customer.Active})";
            // Set the SQL command text
            cmd.CommandText = cmdText;
            // Execute the SQL insert command and get the number of affected rows
            int rowsAffected = cmd.ExecuteNonQuery();
            // Check if any rows were affected (i.e., the record was successfully inserted)
            return rowsAffected > 0;
        }
    }
Update Data
Next, write the method to update the existing records in the CSV file as soon as this method is called:
    public bool Update(Customer customer)
    {
        // Display a message indicating that a record is being updated
        Console.WriteLine("Updating a record...");
        // Create a connection to the CSV database using the provided connection string
        using (var con = new C1CSVConnection(_csvConnectionString))
        {
            con.Open();
            // Create a command for SQL update
            var cmd = con.CreateCommand();
            // Generate the SQL command text for updating the customer record based on its ID
            var cmdText = $"UPDATE {_fileName} " +
                          $"SET Country = '{customer.Country}', Name = '{customer.Name}', " +
                          $"Amount = {customer.Amount}, Active = {customer.Active} " +
                          $"WHERE ID = {http://customer.ID }";
            // Set the SQL command text
            cmd.CommandText = cmdText;
            // Execute the SQL update command and get the number of affected rows
            int rowsAffected = cmd.ExecuteNonQuery();
            // Check if any rows were affected (i.e., the record was successfully updated)
            return rowsAffected > 0;
        }
    }
Delete Data
Now, we will write the method to delete the targeted record from the CSV file when the method is called with the targeted primary key value:
    public bool Remove(int id)
    {
        // Display a message indicating that a record is being removed
        Console.WriteLine("Removing a record...");
        // Create a connection to the CSV database using the provided connection string
        using (var con = new C1CSVConnection(_csvConnectionString))
        {
            con.Open();
            // Create a command for SQL delete
            var cmd = con.CreateCommand();
            // Generate the SQL command text for deleting the customer record based on its ID
            var cmdText = $"DELETE FROM {_fileName} WHERE ID = {id}";
            // Set the SQL command text
            cmd.CommandText = cmdText;
            // Execute the SQL delete command and get the number of affected rows
            int rowsAffected = cmd.ExecuteNonQuery();
            // Check if any rows were affected (i.e., the record was successfully removed)
            return rowsAffected > 0;
        }
    }
Finally, our CSV Service is ready to use in the application. Next, we will configure the FlexGrid UI.
Setting Up the FlexGrid
The NuGet package for ComponentOne FlexGrid for ASP.NET Core is already installed in the application, so next, we will set it up using the following steps:
Add the Tag Helper
To work with FlexGrid, add the required tag helper in the _ViewImports.cshtml file:
@addTagHelper *, C1.AspNetCore.Mvc
Register Resources
Next, register the required scripts and styles to be added to the head section of the _Layout.cshtml file. This can be done using the following code snippet:
    <c1-styles />
     <c1-scripts>
     <c1-basic-scripts />
     </c1-scripts>
     <c1-deferred-scripts />
Read more about deferred scripts in the documentation.
Add Map Routing
For ASP.NET Core applications (version 3.0 and above), the following code should be added to the Configure method of Startup.cs or in the Program.cs file:
app.MapControllers();
Now, we are ready to integrate the FlexGrid into the application. Proceed by writing the methods necessary to perform CRUD operations.
Methods Definition in Controller
When performing actions on the client side, the FlexGrid sends an AJAX request to the server, and the data can be updated using these methods with the help of the CSVService class. To perform CRUD operations in the database, the CSV Service class instance should be defined within the Controller. This can be achieved with the following code:
    public class HomeController: Controller{
    private readonly ILogger<HomeController> _logger;
    private CSVService _csvService;
    public HomeController(ILogger<HomeController> logger)
    {
         string filePath = Path.Combine(Directory.GetCurrentDirectory(), "wwwroot\\CSVFiles\\country.csv");
         _csvService = new CSVService(filePath, "country");
         _logger = logger;
    }
    ...
    }
After we create the CSV Service instance, we'll need to define the controller action that the FlexGrid will use to perform CRUD activities.
In this blog, we will use batch edit rather than inline edit for CRUD operations. The batch edit saves multiple calls to the server, and all changes can be made on the server with a single button click.
For this, we will define two methods: one for reading the data from the CSV file and one for updating the changes to the CSV file upon button click:
    #region CSV Service Read and Batch Edit Methods
    public ActionResult Customers([C1JsonRequest] CollectionViewRequest<Customer> requestData)
    {
         var data = _csvService.ReadCustomers();
         return this.C1Json(CollectionViewHelper.Read(requestData, data));
    }

    public ActionResult GridBatchEdit([C1JsonRequest] CollectionViewBatchEditRequest<Customer> requestData)
    {
         return this.C1Json(CollectionViewHelper.BatchEdit(requestData, batchData =>
         {
             var itemresults = new List<CollectionViewItemResult<Customer>>();
             string error = string.Empty;
             bool success = true;
             try
             {
                 if (batchData.ItemsCreated != null)
                 {
                    batchData.ItemsCreated.ToList().ForEach(st =>
                     {
                         _csvService.Add(st);
                         itemresults.Add(new CollectionViewItemResult<Customer>
                         {
                             Error = "",
                             Success = success,
                             Data = st
                         });
                     });
                 }
                 if (batchData.ItemsDeleted != null)
                 {
                     batchData.ItemsDeleted.ToList().ForEach(customer =>
                     {
                         _csvService.Remove(http://customer.ID );
                         itemresults.Add(new CollectionViewItemResult<Customer>
                         {
                             Error = "",
                             Success = success,
                             Data = customer
                         });
                     });
                 }
                 if (batchData.ItemsUpdated != null)
                 {
                     batchData.ItemsUpdated.ToList().ForEach(customer =>
                     {
                        _csvService.Update(customer);
                         itemresults.Add(new CollectionViewItemResult<Customer>
                         {
                             Error = "",
                             Success = success,
                             Data = customer
                         });
                     });
                 }
             }
             catch (Exception e)
             {

             }

             return new CollectionViewResponse<Customer>
             {
                 Error = error,
                 Success = success,
                 OperatedItemResults = itemresults
             };
         }, () => _csvService.ReadCustomers()));
    }

    #endregion
Add the FlexGrid with BatchEdit Action:
Our methods for performing data reading and performing batch edit operations are ready and can be utilized by the FlexGrid. Now, integrate the FlexGrid with an item source that invokes the previously written methods.
After adding the following code to the Index.cshtml file, our application is ready to execute, performing read and update operations on the data in CSV files with FlexGrid.
    <script>
    function newItemCreator(s,e){
         let grid = wijmo.Control.getControl("#theGrid");
         return {ID: grid.collectionView.sourceCollection.length+1 };
    }
    // method to show the success or error message
    function onQueryComplete(sender, e) {
         if(isUpdating){
             if (e.result.success) {
                 setQueryMessage('Updated');
             } else {
                 setQueryMessage(e.result.error, 'queryErrorMessage');
             }
             isUpdating = false;
         }
    }
    //method to perform the Batch Edit operations(send batchedit request)
    function save() {
        let grid = wijmo.Control.getControl("#theGrid");
        var cv = grid.collectionView;
        cv.commit();
    }
    </script>
    <button id="save" onclick= “save()”>Save Changes</button>
    <c1-flex-grid  id="theGrid" new-row-at-top=true allow-add-new=true auto-generate-columns=false>
        <c1-flex-grid-column is-read-only=true binding="ID"   width="*"></c1-flex-grid-column>
        <c1-flex-grid-column binding="Country" width="*"></c1-flex-grid-column>
        <c1-flex-grid-column binding="Name" width="*"></c1-flex-grid-column>
        <c1-flex-grid-column binding="Amount" width="*"></c1-flex-grid-column>
        <c1-flex-grid-column binding="Active" width="*"></c1-flex-grid-column>
        <c1-flex-grid-column binding="Buttons" width="*" header="Edit"></c1-flex-grid-column>
        <c1-items-source new-item-creator="newItemCreator" disable-server-read="false" query-complete="onQueryComplete" read-action-url="@Url.Action("Customers")" batch-edit-action-url="@Url.Action("GridBatchEdit")"></c1-items-source>
    </c1-flex-grid>
Conclusion
Through this blog, we delved into setting up the FlexGrid control, a powerful tool for displaying and manipulating data within our ASP.NET Core application. Through detailed explanations and code snippets, we learned how to implement CRUD methods with the help of the ComponentOne CSV DataConnector, enabling seamless data manipulation to the CSV files from the client side.