I hope you haven't forgotten about Pigshell?
Well, I am not writing this post to share my completion. I'll be sharing my current progress.
What I have completed?
Unfortunately, my laptop didn't want to get charged up.

So I could not post any updates.
I have completed loading the image and adding a grayscale filter to the uploaded image. It took me a little time to implement this as I had not worked with <canvas> HTML element before.
The working steps are explained below :
Step 1 : Taking Image to Convert
The thing is uploading images are easy. Just take an input element and specify the type of input :
<input type="file" accept="image/*" name="uploadedImage" id="uploadedImage"/>
Now there are 2 elements to this line :
type="file"accept="image/*"
The first one is simple : only accept file type input
The second one is also similar to it : only accept images, but what does the /* mean?
It means the you can give any type of image as input like png, jpg, jpeg and svg.
Step 2 : Displaying the Uploaded Image
The next step was to display the image just inserted by the user.
This might seem simple : just have a <div></div> that displays the image.
But there are 2 things to understand here :
- The uploaded image is a blob and you cannot display a blob directly in HTML.
- We create a URL for the uploaded image and add it to the
<img/>element.
Note that I am using React, so the syntax is
JSX
<img src={previewImage} alt="to convert" ref={uploadRef} />
const [previewImage, setPreviewImage] = useState(null);

const uploadRef = useRef(null);

function fileChangedHandler(event){
   setImageToConvert(new Image(event.target.files[0]));
   setPreviewImage(URL.createObjectURL(event.target.files[0]));
 }
But there are 2 issues with the styling here.
- The images uploaded maybe landscape or portrait mode, and
- The image size may exceed the size of the div
Naturally, I had to use a max-width and object-fit:contain properties together to make the image adjust.
Step 3 : The main event - Loading image to Canvas
When trying to think how to convert images to pixel values, the first thing that came to my mind was : canvas.
The next thing tat came : I don't know how??

Naturally, I headed to MDN and studied about it. I came to the conclusion that loading images to canvas is very simple.
You can also checkout this post by FreeCodeCamp for a detailed explanation for that.
The code I used is this in React :
    const canvRef = useRef(null); // I am using this to refer to the canvas element as I cannot use querySelector in React.

const loadImageToCanvas = ()=>{
      const canvas = canvRef.current;
      const ctx = canvas.getContext('2d');
      const currImage = new Image();
      currImage.src = previewImage;

      canvas.height = currImage.height;
      canvas.width = currImage.width;
      ctx.drawImage(currImage, 0,0, canvas.width, canvas.height);
    }
This code simply loads the image to the canvas.
But there was a confusion that made me slow down : What do I pass as the image in the drawImage() function.
I tried passing the file uploaded directly, as this was my first thought.
But this didn't work.
Then I understood after some reading that the function accepts the Image() object only.
So I had to use this piece of code to get that :
const currImage = new Image();
currImage.src = previewImage;
Step 4 : Grayscale Filter
An important concept that I learned in my Image Processing class is that :
The grayscale value of a pixel in a color image in the average of the Red, Green and Blue values of that pixel.
I had to use it here. But how to get the rgb() value of a particular pixel?
I came across a function : getImageData() which was a function of the canvas element.
This returns an array (not a simple one, but something called a Uint8ClampedArray ), which we can iterate over and get the RGBA values of each pixel.
We can just calculate the average and replace the original data for that particular pixel.
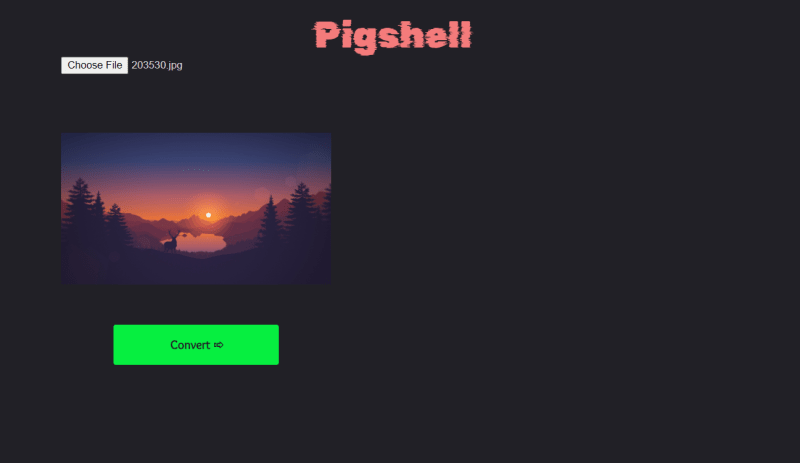
This magically gives us the grayscale image of the original image :

And there we have it : the current status of Pigshell.
You can checkout the whole code here on 👉👉 Github
Do remember to checkout the previous post to see the plan.
Cover Image by Jakob Owens on Unsplash