I ran into the CFO of a startup who told me about a vendor they depended on to perform a critical backend process. He was frustrated that, due to the vendor’s antiquated deployment processes, manual testing procedures, and the routine half-day of downtime every new release, his customers and his business were disrupted. He needed a reliable service and subsequently ended the relationship.
Avoiding downtime while reducing the risk of exposing users to breaking changes when deploying applications is a major challenge. I’ll be pulling from my experience as a software engineering instructor and active user of Heroku to show you how to minimize deployment risk, and achieve zero downtime deployments. We’ll use a Node.js app as an example, but these practices and procedures are transferable to apps written in everything from PHP to Elixir.
Minimizing deployment risk and why it’s a challenge
The risk of exposing users to breaking changes in a deployed application cannot be overstated. At best, the user has a negative experience with your non-functional app (still very bad); at worst, the error can have significant security implications and destroy user trust and client relationships.
Unfortunately, no process can completely prevent deploying bugs. You will ship broken code. The important thing is how quickly you can identify issues and fix them — or better yet, use a continuous integration and continuous delivery (CI/CD) pipeline to identify and diagnose issues before they’re deployed to production.
You can protect your app and its users from broken code, availability issues, and deployment process headaches while moving toward zero downtime deployment. You’ll also have the advantage of a faster deployment process and lower lead times from code check-in to production by automating your deployment process. Here are several best practices to follow when deploying apps on Heroku.
Best Practices
CI/CD and automated testing
Modern development operations supporting agile development teams require CI/CD and automated testing. Regardless of what you’re using (Circle CI, Travis, Heroku CI, AWS CodePipeline, etc.), running an automated test suite as part of your deployment process is a modern necessity and best practice for streamlined development.
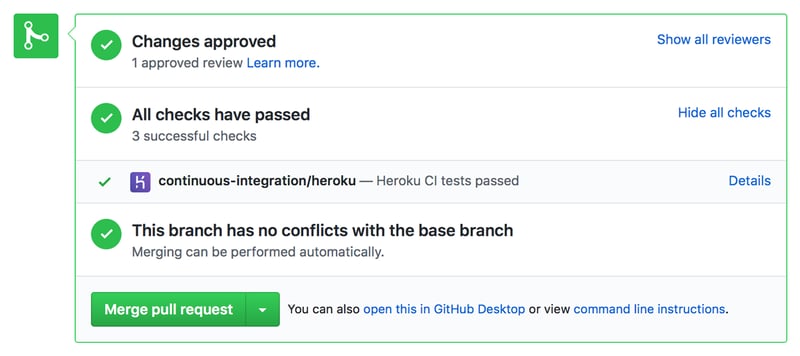
If you are deploying to Heroku and using the GitHub integration, then Heroku CI can run your app’s test suite with every deploy, enabling you to easily review test results before merging or deploying breaking changes to your application. Heroku CI is also easy to configure — just check out how to use Heroku CI or Heroku CI features and functions for more information.
Heroku CI also supports distributing test runs across up to 32 dynos to substantially reduce execution time.
Multiple dynos
It’s not enough just to have good CI tools — you should horizontally scale your dynos to have enough redundancy to help ensure uptime, app availability, and a great user experience. Because dynos cycle everyday to maintain app stability and sometimes go down for maintenance, you must use at least two or more dynos in production to achieve zero downtime.
Depending on the throughput requirements of your service or application, you might also want to vertically scale to ensure enough reserve capacity. Heroku provides a great developer experience here and enables both vertical and horizontal scaling with a simple-to-use command line interface.
Review apps
What better way to identify bugs and breaking changes than running your apps in a safe test environment? Review apps run your code in a new, disposable Heroku app after a successful GitHub pull request. Review apps each have a distinct URL that you can share, making them an excellent way to suggest, test, and combine changes and modifications across a development team with zero risk. For each pull request, you can configure review applications to be created automatically, or you can construct them manually.
In order for your review app to work, create an app.json file in the root of your app’s GitHub repo. The app.json file is used to configure new apps created when pull requests are created. The app.json file is a powerful tool that lets you specify value inheritance while provisioning add-ons using the add-on provider’s default plan.
Heroku Pipelines
A Heroku Pipeline is a collection of Heroku apps that share the same codebase. Each app in a pipeline represents one of the following stages in a continuous delivery conveyor belt: Development, Review, Staging, and Production.
It’s obvious and nearly ubiquitous in the software engineering industry to maintain a staging environment parallel to production; pipelines are useful for controlling this multi-staged deployment process. An example pipeline workflow has the following steps:
- A developer creates a pull request to add a new feature or fix a bug.
- Heroku then automatically creates a review app for the pull request, allowing developers to test the app prior to staging or production.
- If the change passes all manual and automated testing, it’s merged to the master branch.
- The master branch is automatically deployed to the pipeline’s staging app for further testing.
- When ready, a developer promotes the staging app to production.
Here’s a sample pipeline diagram from the documentation:
Pipelines manage the flow of code slugs only. Your app’s Git repo, config vars, add-ons, and other environmental variables must be managed separately. Alternatively review apps can inherit config vars, a useful quality of life feature.
Promotion to production
A final manual review before promoting to production is an important quality control check in an otherwise mostly automated process. Humans can catch things that slip through even the most robust automated testing procedures, so it’s important to not totally decouple human oversight in pursuit of automation efficiency. Plus, it’s more fun to have someone specific to blame when things go wrong (just kidding — check out Nickolas Means’ amazing talk on systemic failures in complex automated systems and how to avoid them while building psychological safety in your team).
From the CLI, you can promote a slug with the following command (the command must specify the name (with the (-a) flag or Git remote with the (-r) flag) of the source app):
$: heroku pipelines:promote -r staging
A complete list of pipelines commands with usage details is available with:
$: heroku help pipelines
Release tasks (migrations)
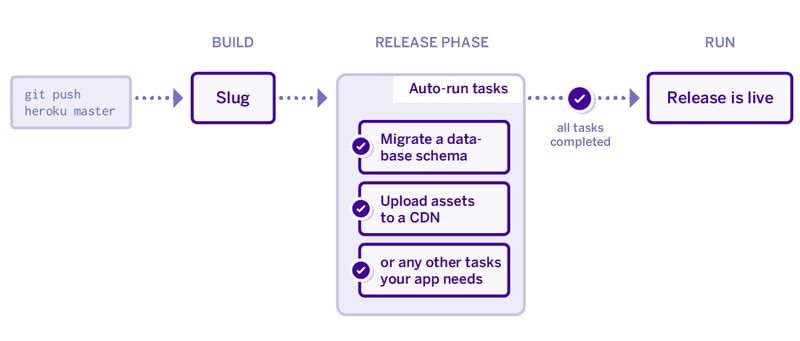
Heroku’s release phase feature allows you to execute certain tasks prior to deploying your application. If a release phase task fails, the new release is not deployed, leaving your current release unaffected and thus reducing the risk of deploying a breaking change. Release phase can be useful for tasks such as sending CSS, JS, and other assets from your app’s slug to a CDN or S3 bucket, priming or invalidating cache stores, or running database schema migrations.
It is important to note that a release, a slug, and a review app are all different ideas in the context of Heroku’s architecture (make sure to refer to this high-level technical description of how Heroku works for clarity). The release command runs in a one-off dyno whenever a new release is created, unless the release is caused by changes to an add-on’s config vars.
The following events create a new release:
- A successful app build
- A change to the value of a config var (unless the config var is associated with an add-on)
- A pipeline promotion
Define release tasks in your Procfile:
release: ./release-tasks.sh
Preboot
Help! My application boot time is slow and leaves the app unavailable during dyno restarts. Preboot is the solution. Instead of stopping the existing set of web dynos before starting the new ones, preboot starts the new web dynos (and allows them to receive traffic) before the existing ones are stopped.
To enable run:
$: heroku features:enable -a myapp preboot
There are a number of potential pitfalls to using this feature, so make sure to read the caveats of preboot before using it. For example, when you make releases with preboot, you will have two versions of your code running at the same time (overlapping for up to 3 minutes), although only one version will be serving user requests. This can potentially cause issues with external services and some Heroku add-ons.
Production monitoring and APM
Great DevOps doesn’t just stop at deployment. Heroku offers built-in application metrics along with hundreds of add-ons in their marketplace that make it easy to set up monitoring for your applications in production. Use Application Performance Management (APM) services like New Relic and AppOptics to quickly identify and fix issues.
DevOps teams (or development teams) can monitor error rates, record component-specific latency and throughput, and surface bugs/failures and the conditions that led to them. Other monitoring, logging, and error diagnostics tools like Pingdom, Papertrail, Rollbar and StillAlive are also available add-ons in the Heroku ecosystem. These tools benefit any production application and team looking to improve their product, or quickly solve issues when things go wrong.
Conclusion
Zero downtime deployment enabled by a smooth, painless CI/CD process should be the goal for most complex production applications. Apply these best practices to help your team create a great user (and developer) experience.


